Editing a Power Automate Flow
Table of Contents
- Connectors, Actions, and Triggers Used
- Notes and Tips
- Functions
- Common or More Complex Sequences of Actions
Connectors, Actions, and Triggers Used
| Connector | Action/Trigger |
|---|---|
| Plumsail Forms | Form is submitted (Trigger) Download attachment |
| Variable | Append to array variable Initialize variable Set variable |
| Control | Apply to each Condition Do until Scope |
| Data Operation | Compose Parse JSON Select |
| Word Online (Business)* | Convert Word Document to PDF Populate a Microsoft Word template |
| SharePoint | Create file Get file content by path |
| Adobe PDF Services* | Merge PDFs |
| Office 365 Outlook | Send an email (V2) |
*Premium connectors
Notes and Tips
Alternative View on Power Automate
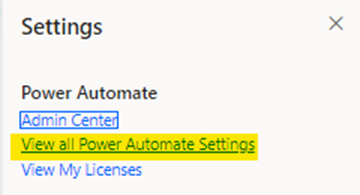
If you want a view for Power Automate that has more space to enter functions (helpful for populating fields) and a different interface for getting dynamic data from Plumsail Forms, click on the gear icon in the top right corner.

Click on “View all Power Automate Settings.”
Enable “Experimental Features.”
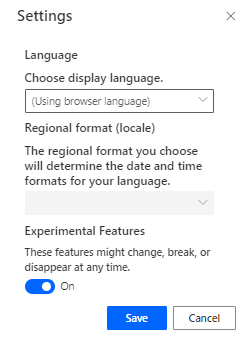
Now you should have more space to write and view expressions and “Dynamic Value” as opposed to the classic interface below:

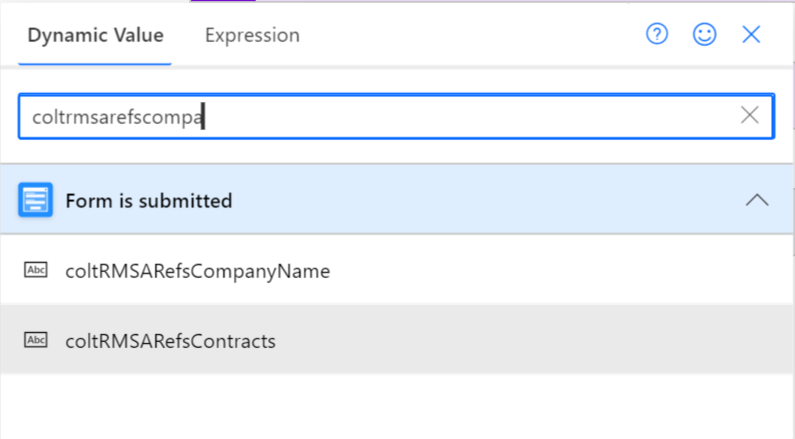
Finding Plumsail Fields/Control Names When Populating Fields in Power Automate
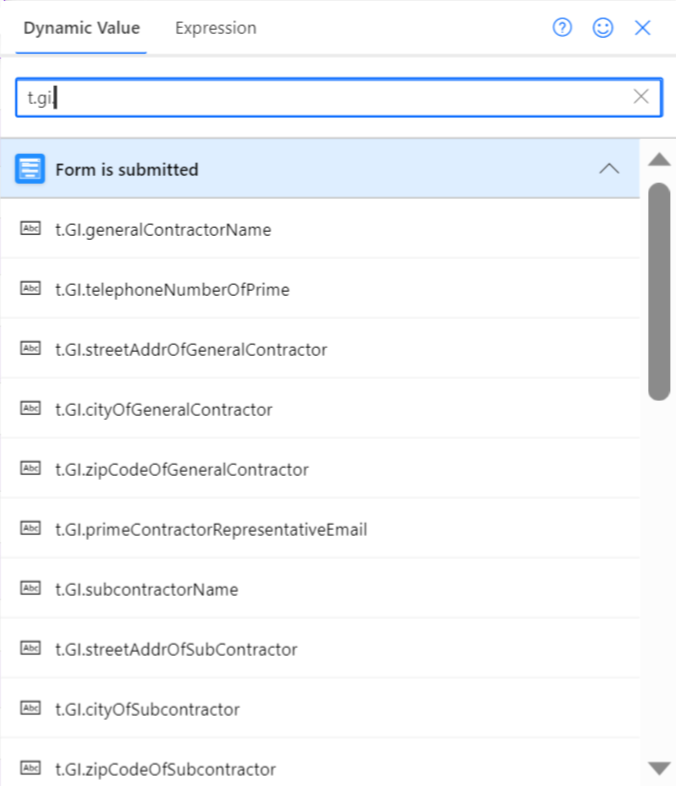
Familiarizing yourself with the naming conventions will be helpful. The first step is to look in Dynamic Value.
Fields that are not shared should be easily found if you type the same name into the “Dynamic Value” search tab. You do not need to type the whole name, just enough to find the field or control you need. If it is not a Data Table column, search first by the data type, then the form that the field or control belongs to, and the sections that it belongs to, separated by periods. If it is a shared field such as the subcontractor EIN or address, you will know because there will not be corresponding dynamic content with the same name. Using the hint in gray text, you can search for the general name and searching with the term <field_type>.GI. to filter information from the “General Information” and “Summary” tabs.
Organizing Using Branches and Scopes
Scopes are very helpful for grouping and hiding actions. They serve as a wrapper for actions and can be named such that you can show the Power Automate flow in a more high-level way. See the difference between the two pictures below:
Making parallel branches allows actions to run in parallel with each other. This can be helpful for increasing the speed of your flow so that not everything runs linearly, but also allows different branches of actions to complete even if another branch fails. For example, Block 2 in the Subcontractor Form as a branch for every form and allows PDFs of the completed forms to be generated independently of the others. In the image below, although Schedule B1’s branch fails to complete, the other branches finish with no errors. Also note how long Schedule B takes to complete and imagine how that can stall future actions had all of the forms been in one branch.
To move onto the next action after a group of parallel branches, all actions in every branch must be complete. You can consider the group as a much larger action in series with the overall flow. Block 1, Block 2, Block 3, and Block 4 are all in series and occur in that respective order.
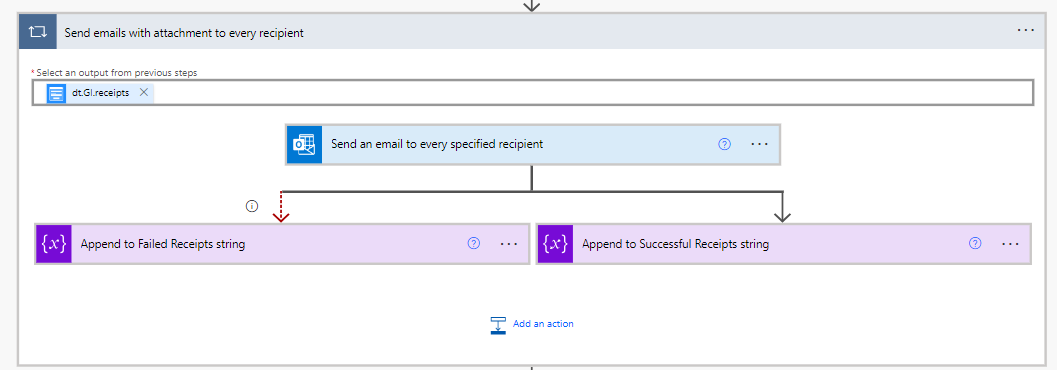
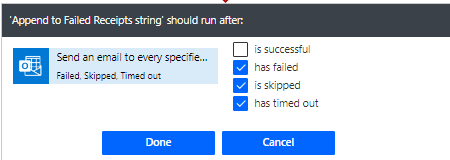
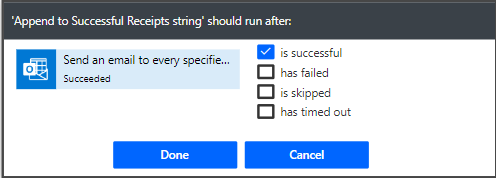
You can configure “Run after” for actions to handle when linearly organized actions fail. In Block 4, the email only gets appended to the “Failed Receipts” string if the corresponding “Send an email to every specified recipient” action failed. This is indicated by the red-dashed arrow. By default, “Run after” is set so that it runs after the previous action is run successfully.
Plumsail Forms - Download Attachment
This action takes one argument - a url from the Plumsail Form for the corresponding Plumsail attachment field. Unfortunately, when you have multiple attachment fields, there is no obvious way to tell which url corresponds to which attachment field.

Presumably, the urls are displayed in the order that they appear in the Plumsail Form. When you add a url in the argument, the “Download attachment” actionwill automatically be nested in an “Apply to each” action because the dynamic value of url is an array of attachments and they are to be saved one at a time. The only way to check that you have the correct url is to check what dynamic value populated automatically as the argument in the “Apply to each” action.
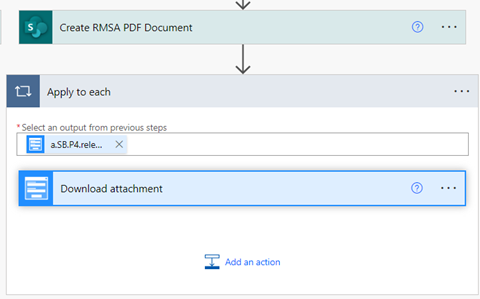
We can see from the name that this url actually corresponds to Schedule B Part 4, not RMSA. If we have not already downloaded this attachment in the branch for Schedule B, we can click and drag this “Apply to each” action to the Schedule B branch and try again for the right attachment. If the dragging action does not work, you may have to save the flow and refresh the page first.
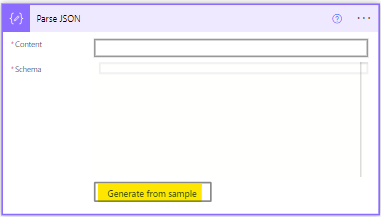
Data Operation - Parse JSON
This action takes two arguments:
- Content: the data table as an array of JSON objects
- Schema: the JSON schema that outlines how the array is structured
Content can be matched directly with the data table from the Plumsail Forms trigger.
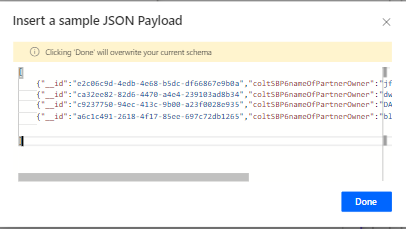
Schema can be either typed or generated from a sample. Generating from a sample is easier if you already have a submission from which you can source an example of a filled out data table. To do so, you would have to click the “Generate from sample” button and paste in the JSON payload.
To find the JSON, navigate to the Submissions –> Any Contract Number –> JSON and select any of the JSON files except for the contract number.
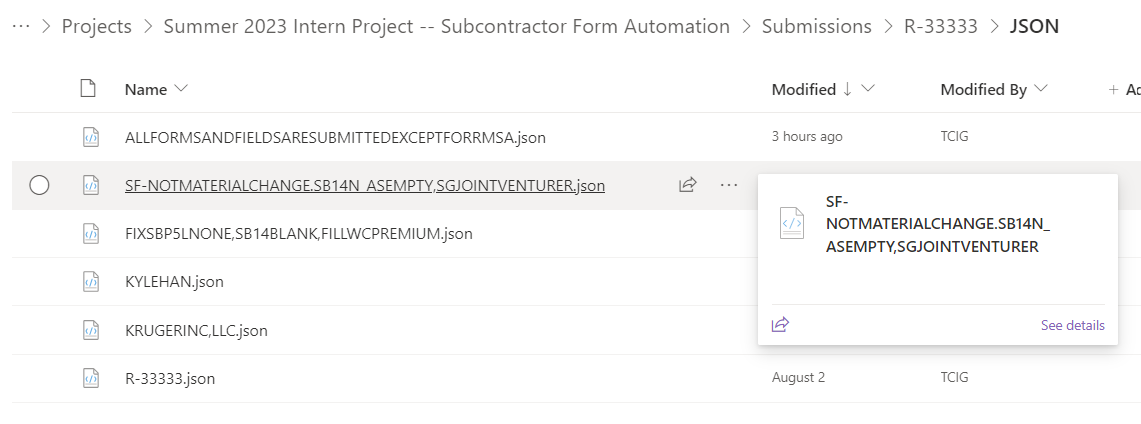
Inside, you can search for the data table using Ctrl + F.
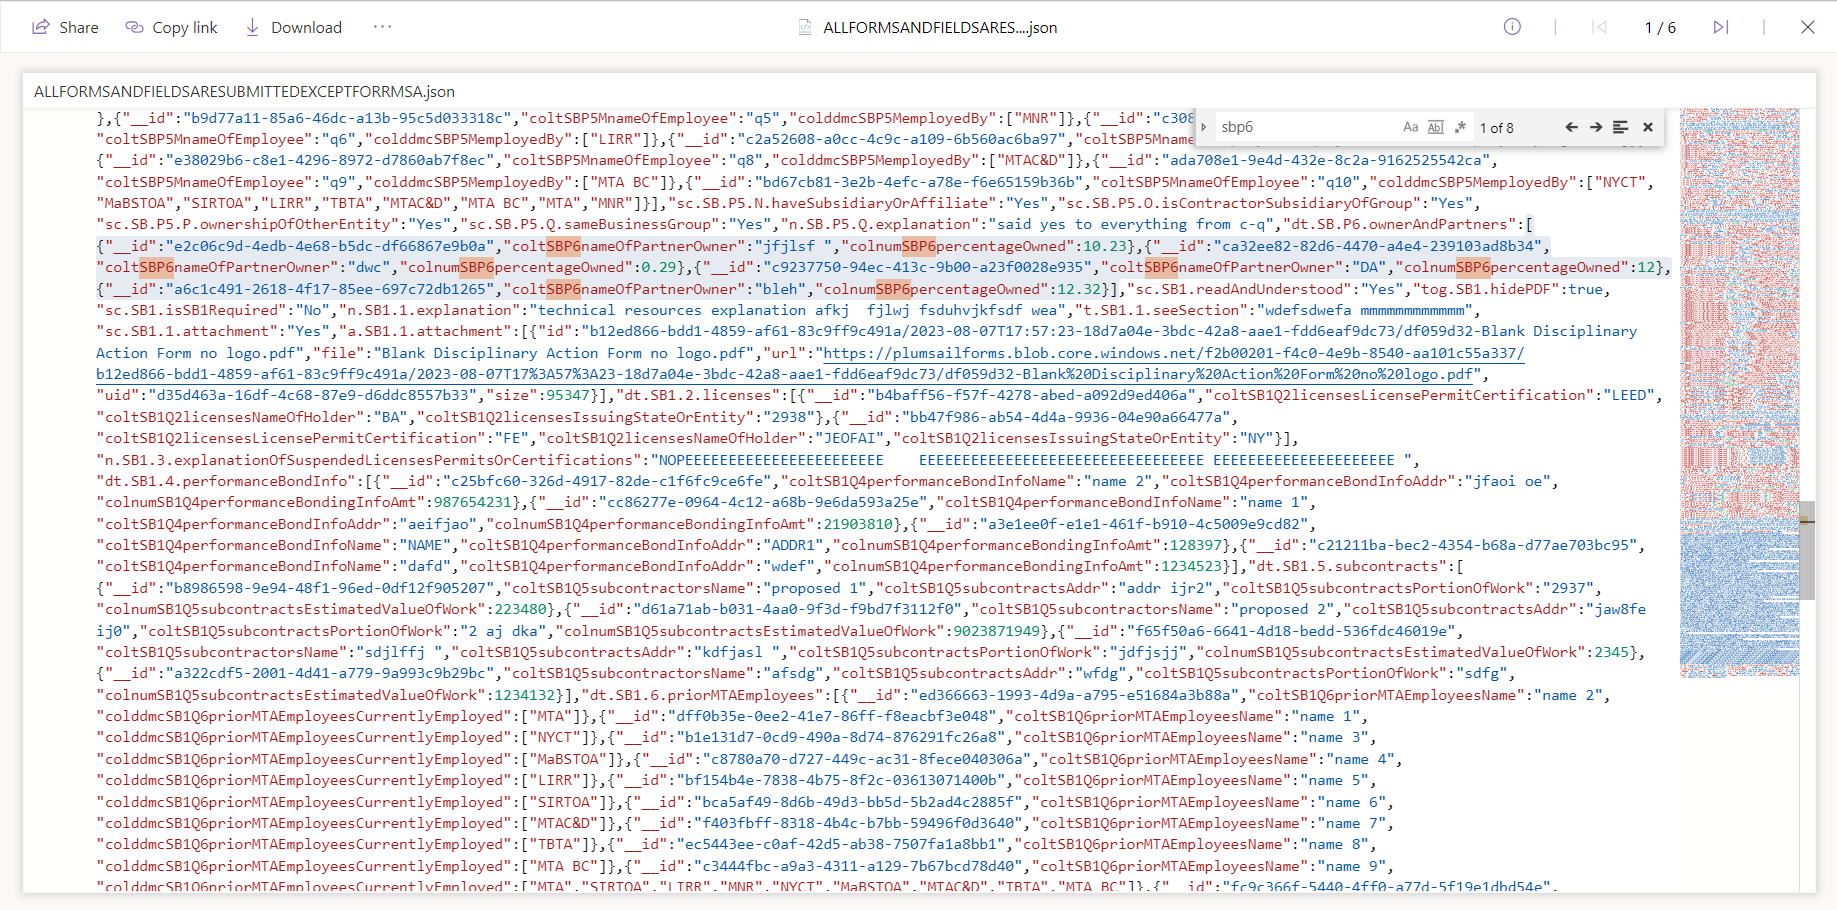
Below are some example JSON arrays and their corresponding schema: Schema with a number - Schedule B Part 6 Data Table:
{
    "type": "array",
    "items": {
        "type": "object",
        "properties": {
            "__id": {
                "type": "string"
            },
            "coltSBP6nameOfPartnerOwner": {
                "type": "string"
            },
            "colnumSBP6percentageOwned": {
                "type": "number"
            }
        },
        "required": [
            "__id",
            "coltSBP6nameOfPartnerOwner",
            "colnumSBP6percentageOwned"
        ]
    }
}
Example of a completed Schedule B Part 6 Data Table:
[
    {"__id":"e2c06c9d-4edb-4e68-b5dc-df66867e9b0a","coltSBP6nameOfPartnerOwner":"jfjlsf ","colnumSBP6percentageOwned":10.23},
    {"__id":"ca32ee82-82d6-4470-a4e4-239103ad8b34","coltSBP6nameOfPartnerOwner":"dwc","colnumSBP6percentageOwned":0.29},
    {"__id":"c9237750-94ec-413c-9b00-a23f0028e935","coltSBP6nameOfPartnerOwner":"DA","colnumSBP6percentageOwned":12},
    {"__id":"a6c1c491-2618-4f17-85ee-697c72db1265","coltSBP6nameOfPartnerOwner":"bleh","colnumSBP6percentageOwned":12.32}

]
Schema with a dropdown (multiple choice) - Schedule B P5 Data Table M:
{
    "type": "array",
    "items": {
        "type": "object",
        "properties": {
            "__id": {
                "type": "string"
            },
            "coltSBP5MnameOfEmployee": {
                "type": "string"
            },
            "colddmcSBP5MemployedBy": {
                "type": "array",
                "items": {
                    "type": "string"
                }
            }
        },
        "required": [
            "__id",
            "coltSBP5MnameOfEmployee",
            "colddmcSBP5MemployedBy"
        ]
    }
}
Sample completed Schedule B P5 Data Table M:
[
    {"__id":"e2193d4c-bb2a-4a13-85cb-f4df6174276e","coltSBP5MnameOfEmployee":"q1","colddmcSBP5MemployedBy":["MTA"]},{"__id":"ed176240-0759-441a-bfeb-acc3939795ab","coltSBP5MnameOfEmployee":"q2","colddmcSBP5MemployedBy":["NYCT"]},
    {"__id":"a4f1ae6a-d017-498b-9105-bcf141e78bae","coltSBP5MnameOfEmployee":"q3","colddmcSBP5MemployedBy":["MaBSTOA"]},{"__id":"e59487d2-a3bc-4256-81c8-70acf60018eb","coltSBP5MnameOfEmployee":"q4","colddmcSBP5MemployedBy":["SIRTOA"]},
    {"__id":"b9d77a11-85a6-46dc-a13b-95c5d033318c","coltSBP5MnameOfEmployee":"q5","colddmcSBP5MemployedBy":["MNR"]},{"__id":"c30863e4-4e91-4a85-8a01-4c7898885d2a","coltSBP5MnameOfEmployee":"q6","colddmcSBP5MemployedBy":["LIRR"]},
    {"__id":"c2a52608-a0cc-4c9c-a109-6b560ac6ba97","coltSBP5MnameOfEmployee":"q7","colddmcSBP5MemployedBy":["TBTA"]},{"__id":"e38029b6-c8e1-4296-8972-d7860ab7f8ec","coltSBP5MnameOfEmployee":"q8","colddmcSBP5MemployedBy":["MTAC&D"]},
    {"__id":"ada708e1-9e4d-432e-8c2a-9162525542ca","coltSBP5MnameOfEmployee":"q9","colddmcSBP5MemployedBy":["MTA BC"]},{"__id":"bd67cb81-3e2b-4efc-a78e-f6e65159b36b","coltSBP5MnameOfEmployee":"q10","colddmcSBP5MemployedBy":["NYCT","MaBSTOA","SIRTOA","LIRR","TBTA","MTAC&D","MTA BC","MTA","MNR"]}
]
If you want to type it out, use the examples above and the table below to infer.
| Type of Plumsail Field/Control | JSON type |
|---|---|
| Text | string |
| Note | string |
| Number (no decimals) | integer |
| Number (with at least 1 decimal place) | number |
| Single Choice | string |
| Multiple Choice | array of string |
| Date | string |
Functions
Functions used in expressions in the Power Automate Flows of this project are listed below in alphabetical order:
Logic and Compare
coalesce
Takes as many arguments as you provide it and returns the first non-null value. This is useful for defaulting values if a null value is provided.
Example: coalesce(triggerBody()?['n.SB.P1.D.changedAddress'], 'N/A')
contains
Returns whether a string contains another string.
Example: contains(item()['colddmcSBP5MemployedBy'], 'MTAC&D'
equals
Takes two arguments and returns whether they are equal.
Example: equals(triggerBody()?['sc.SB.P3.H.compensationRating'], 'Yes')
if
Takes three arguments:
- Condition that returns a boolean value
- Value to return if condition is true
- Value to return if condition is false
Example: if(equals(triggerBody()?['sc.SB.P5.L.none'], 'None'), 'None', '')
or
Takes two arguments and returns true if either argument is true. Example: or(equals(triggerBody()?['sc.SB.P3.G.safety'], 'Yes'), equals(triggerBody()?['sc.SB.P3.H.compensationRating'], 'Yes'))
Arithmetic
add
Add numbers and returns the sum.
Example: add(2, 4.9)
div
Takes two arguments and divides the first argument by the second.
Example: div(9, 3.0)
sub
Subtracts the second number from the first number.
Example: sub(10, 3.1)
String Formatting
concat
Concatenate arguments into one string.
Example: concat('Happy ', 'birthday ', '2 ', 'u!')
float
Takes a number argument and convers it to a float.
Example: float(8)
formatDateTime
Format dates and times using macros. See the below links for more information:
- https://learn.microsoft.com/en-us/troubleshoot/power-platform/power-automate/how-to-customize-or-format-date-and-time-values-in-flow
- https://learn.microsoft.com/en-us/power-automate/format-data-by-examples#format-dates-by-examples
Example: formatDateTime(triggerBody()?['d.GI.dateSigned'], 'MM/dd/yyyy')
formatNumber
Used mostly to format currencies and percentages. See these links for more information:
- https://tomriha.com/how-to-format-numbers-currency-percentage-in-power-automate/#:~:text=How%20to%20format%20numbers%20%28currency%2C%20percentage%2C%E2%80%A6%29%20in%20Power,format%20them%20within%20the%20Power%20Automate%20flow.%20
- https://learn.microsoft.com/en-us/power-automate/format-data-by-examples#format-numbers-by-examples
Currency example: formatNumber(item()['colnumOCIPFB2insurancePremiumPayroll'], 'C', 'en-US')
Percentage example: formatNumber(div(float(item()['colnumSF1Q6activeContractsPercentCompleted']), 100), 'P')
replace
Takes three arguments and replaces specific characters from a source string with specified characters.
- Source string to replace characters in
- String to replace
- String to replace with
Example: replace(variables('Sanitized sub name'), item(), '')
split
Takes a string to split into an array based on a character or sequence of characters. See these links for more information:
- https://zeitgeistcode.com/power-automate-split-function/
- https://learn.microsoft.com/en-us/power-platform/power-fx/reference/function-split
Example: split( "Apples, Oranges, Bananas", "," )
Array and JSON Object Operations
addProperty
Add a property to a JSON object given object to add to, the name of the property, and the value of the property.
Example: addProperty(items('Add_checkbox_fields_to_each_object_in_SB_P5_M1_Data_Table_Array'), items('Iterate_through_the_list_of_checkbox_fields_SB_P5_M1_Data_Table_Array'), '')
createArray
Creates an array containing the elements specified in the arguments.
Example: createArray('.','@','ß','²','³','µ','´','°','^','=','(',')','&','$','§', '~','#','%','*',':','<','>','?','/','|',' ', ',')
Common or More Complex Sequences of Actions
For help on specific Power Automate Actions, see Additional Notes on Actions. For help on specific Power Automate Functions, see Functions.
Populating a Word Document and Generating a PDF
If you are creating a new form, create a parallel branch to the other branches that populate a Word Document from a template and generate a PDF.
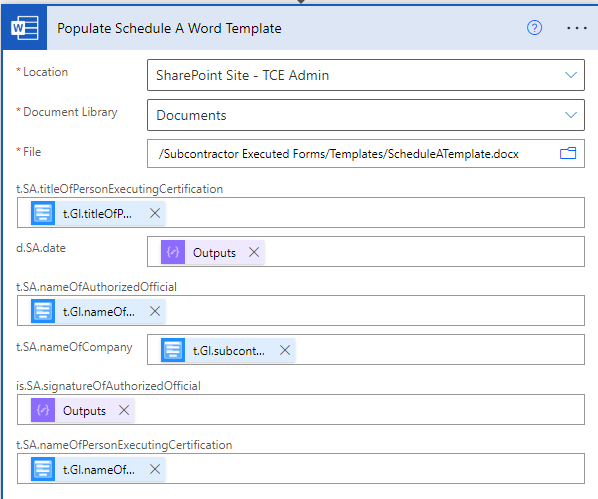
- Add a “Populate a Word template” action.
- Location: website where template file is located (SharePoint Site - TCE Admin)
- Document Library: document library where template file is located (Documents)
- File: the relative path of the template. (/Subcontractor Executed Forms/Templates/<template name>)
It’s recommended that you use the folder icon to navigate to the template yourself first, then cut the text from the box and re-paste it. This will ensure that you have the correct directory and avoid errors from Power Automate being unable to find the file if you update the template and reupload with the same name.
- Fill in the fields as needed by formatting and matching the appropriate fields.
- Rename the action to be a descriptive and unique name.
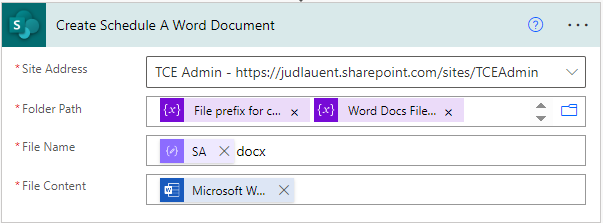
- Add a “Create file” action. This action will create the Word Document from the template filled with the data specified in Step 1 and place it in a SharePoint folder.
- Site Address: base URL to place the populated Word Document in.
- Folder Path: the relative path of the Word Document to be created. Using the conventions, the folder path for an individual Word Document is:
.../<contractNumber>/<subcontractorName>/<timestamp>/Individual Word DocumentsIn the image, the above expression has already been formatted as a variableFile prefix for creating filesappended by another variable calledWord Docs File pathlocated in Block 1 which you can access through “Dynamic Value”
It’s recommended that you use the folder icon to navigate to the template yourself first, then cut the text from the box and re-paste it. This will ensure that you have the correct base directory.
- File Name: the file name of the Word Document. The file name prefix has already been defined in a variable called
Form Order and Filenames- a JSON object which is parsed with a “Parse JSON” action calledParse subcontractor form filenames JSONin Block 1. Each property’s key is the abbreviated version of the corresponding form and the value is the file name prefix. If you are adding a new form, you will need to add the file name prefix toForm Order and Filenamesand update the schema in theParse subcontractor form filenames JSONaction. Then, in this field use the “Dynamic Value” and find the appropriate output from theParse subcontractor form filenames JSONaction and append it withdocx. - File Content: in “Dynamic Value,” select the Microsoft Word Document output from the “Populate a Word template” action from before.
Add a “Convert Word Document to PDF” action.
- Location: website where the Word Document to convert is located
- Document Library: document library where the Word Document to convert is located
- File: the relative file path of the Word Document to convert
The File is the variable
File prefix for convertingappended byNamefrom the previous “Create file” action.
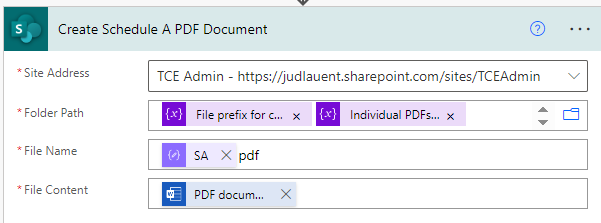
- Add another “Create file” action. This will create the PDF file that resulted from the conversion. The fields are filled out in a similar fashion to Step 2:
- Site Address: same as Step 2
- Folder Path: same as Step 2 except instead of
Individual Word Documentsit isIndividual PDF Documents:.../<contractNumber>/<subcontractorName>/<timestamp>/Individual PDF DocumentsIn the image, the above expression has already been formatted as a variableFile prefix for creating filesappended by another variable calledIndividual PDFs File pathlocated in Block 1 which you can access through “Dynamic Value”
It’s recommended that you use the folder icon to navigate to the template yourself first, then cut the text from the box and re-paste it. This will ensure that you have the correct base directory.
- File Name: the file name of the Word Document. Same as Step 2 but instead of appending with
docx, you append withpdf. - File Content: in “Dynamic Value,” select the PDF Document output from the “Convert Word Document to PDF” action from before.
If this form is not always required and the form needs to be merged into a packet, you will also have to add an “Append to array variable” action. It doesn’t matter the order you put this action, as long as it is in the same branch. Right now, this action is above the “Populate a Word template” action. The arguments should be filled out such that the array to append to is the array of forms for the particular packet that the form belongs to and the value is the file name for the form from the
Parse subcontractor form filenames JSONaction.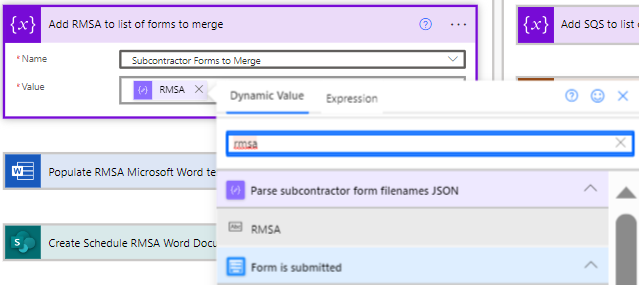
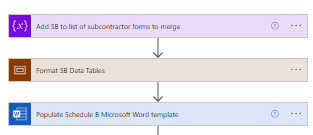
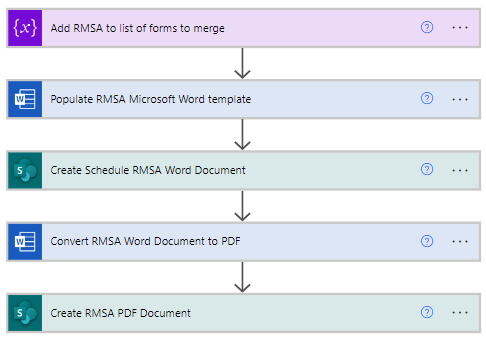
You’re done! Below is an example of a completed “Populate a Word Template and Create PDF” sequence.
Handling Data Tables
Many forms have data tables in them, and depending on the contents, further processing may be needed. When populating Repeating Section Content Controls, there will be a corresponding Plumsail Data Table. Data tables are arrays of JSON objects and examples of schemas are provided. Passing an empty array to a Repeating Section Content Control when populating a Word Template will result in zero instances of that Repeating Section Content Control. Outlined below are some cases that occurred in the flows. Schedule B’s branch has the most data tables and will be most helpful if you need examples.
- Case 1: No Extra Formatting Needed
- Case 2: Dates, Currencies, and/or Percentages
- Case 3: Multiple Choice Drop Down
- Case 4: Non-Required Data Tables
- Case 5: Default Values
Case 1: No Extra Formatting Needed
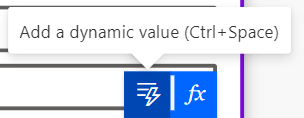
Change the input of the data table field in Power Automate so that it takes an array by clicking the blue icon in the top-right corner. Then find the corresponding data table in “Dynamic Value” and add that as the input.

Back to Handling Data Table Cases Back to Top
Case 2: Dates, Currencies, and/or Percentages
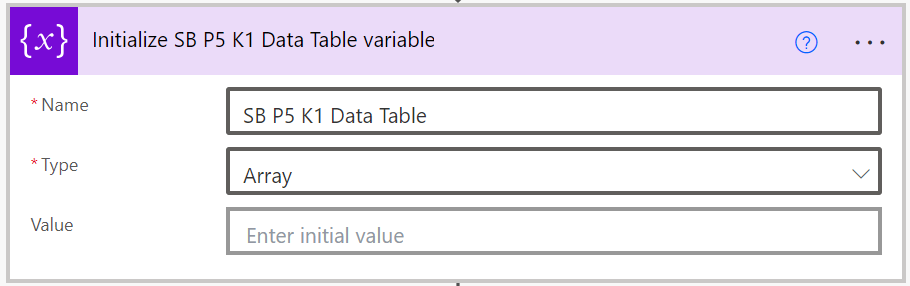
Initialize an array variable for your data table. Give the name of the action and the name of the variable descriptive names.
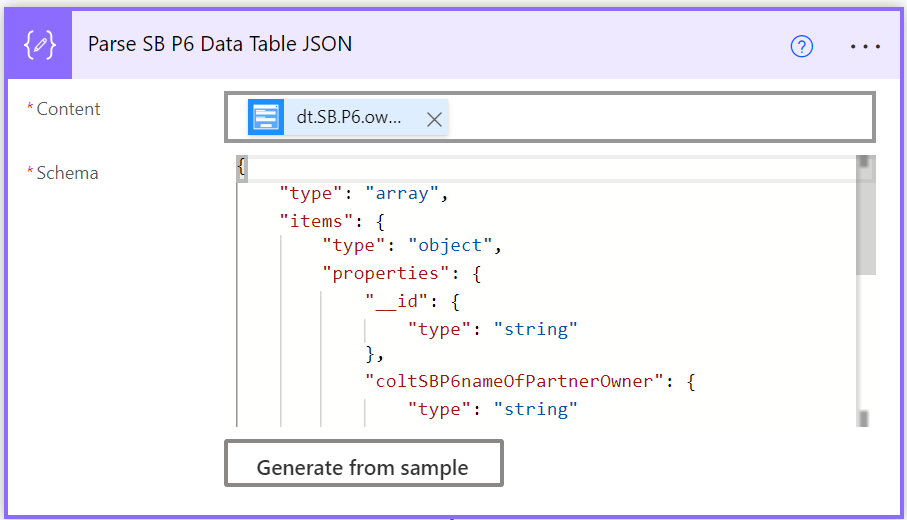
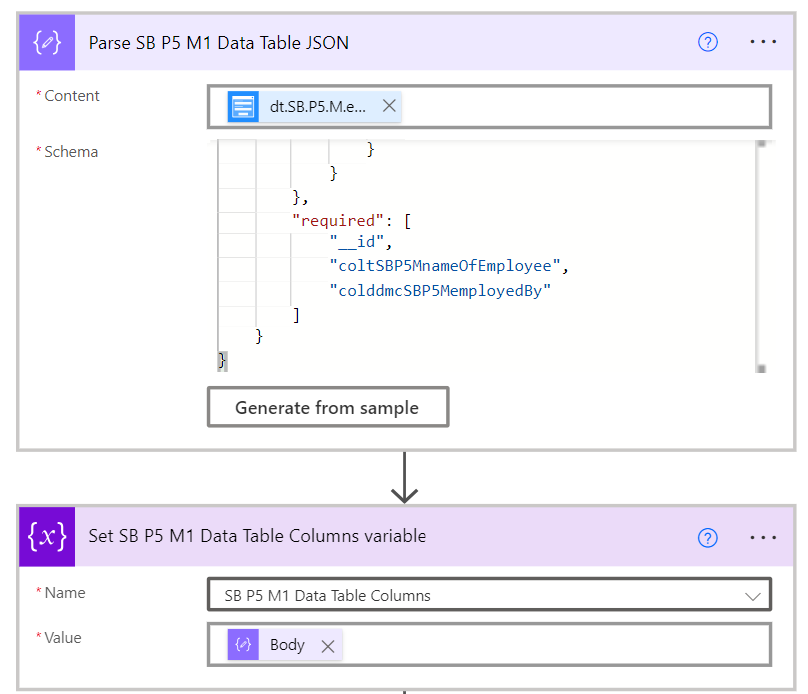
- Add a “Parse JSON” action and rename it to be descriptive. Provide the following arguments:
- Content: the data table you need to parse
- Schema: the JSON schema. This is how the JSON code that you are passing in is structured. The easiest way to add this is to use the “Generate from sample” button and pasting in an example JSON array from a prior form submission. You can also type it out yourself. See the section on Data Operation - Parse JSON for more information.
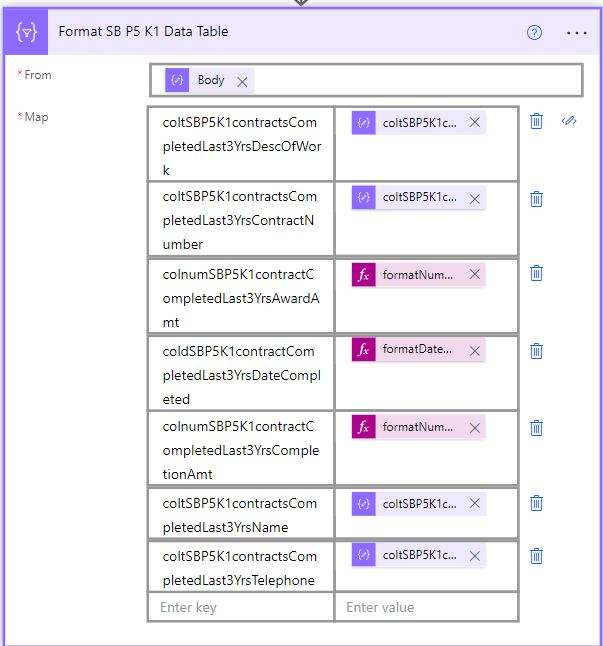
- Add a “Select” action. Provide the following arguments:
- From: the body of the previous “Parse JSON” object
- Map: the left column will be the key and the right column will be the value. Copy and paste in the names of all the columns that you want to include in your data table on the left (usually all of them except for
__id). On the right, format the outputs from the “Parse JSON” action usingformatDateTimeandformatNumberif needed. Otherwise, you can simply map the corresponding output for text fields.
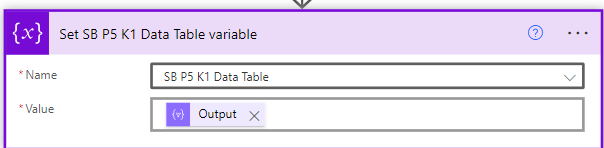
Set the data table variable equal to the output of the “Select” action.
Map the variable to the corresponding Content Control.

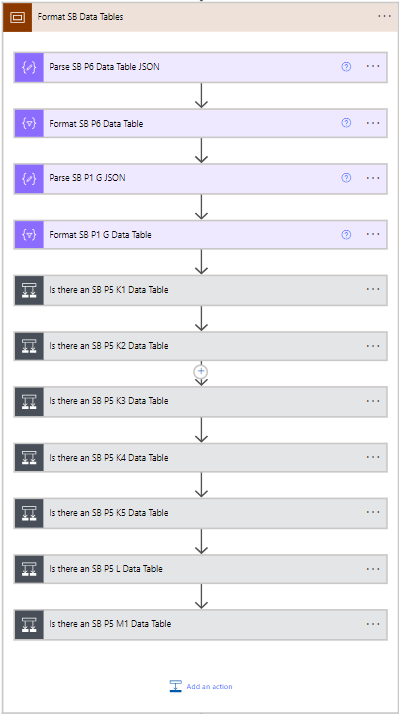
- [OPTIONAL] You can place your “Parse JSON,” “Select,” and “Set variable” actions in a [“Scope”(https://www.bloomsoftwareco.com/blog/keep-your-flows-organized-using-scopes-in-power-automate)] to organize them into one block. This can be helpful especially if you have many data tables to handle. You cannot place “Initialize variable” actions in a “Scope” however, as Power Automate requires this to be on the top-level and it cannot be nested in any action. When placing actions in a “Scope”, order is important as these actions depend on the one before.
Back to Handling Data Table Cases Back to Top
Case 3: Multiple Choice Drop Down
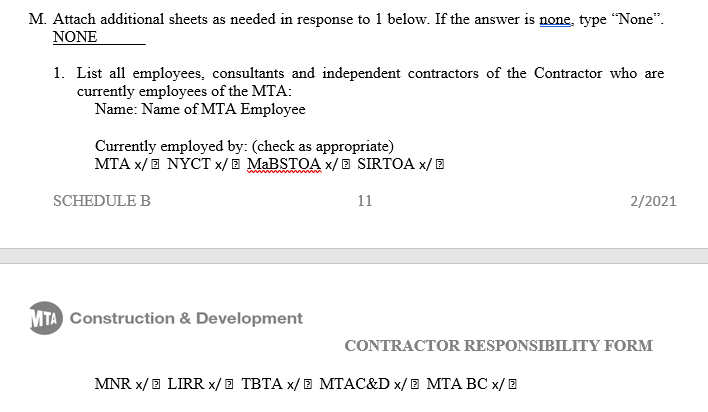
Data tables that have drop-downs with multiple choices or data that translates to multiple checkboxes or radio buttons on the template will require you to add new properties to the JSON objects in the JSON array. For example, Schedule B Part 5 M’s data table asks the subcontractor to list all options that apply and has several checkboxes.
To accomplish this follow the below steps:
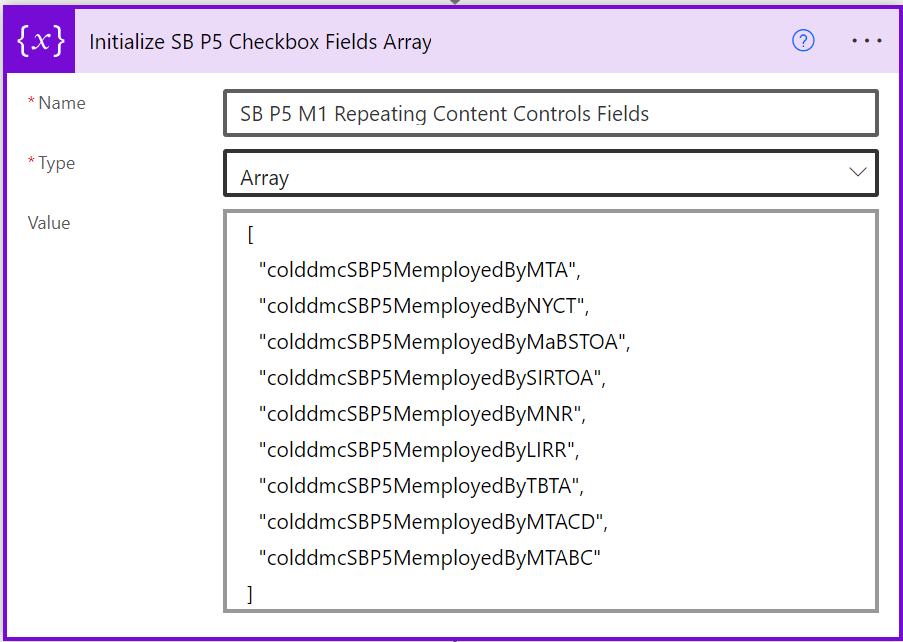
Initialize an array of all of the checkbox/button internal names.
Follow steps 1-2 in Case 2.
Set the data table variable equal to the output of the “Parse JSON” action.
Create an “Apply to each” action and select the output of the “Parse JSON” action. Give this a descriptive name.
Within the “Apply to each” action, add another “Apply to each” action and select the array of internal names you made in Step 1.
- Append each property to each JSON object within the data table array. Add a “Compose” action and in the “Inputs” field, add an expression with the function
addProperty. Provide this the following arguments:- The JSON object to add a property to - “Current item” from the outer “Apply to each” action in Step 4
- The key to add to the JSON object - “Current item” rom the inner “Apply to each” action in Step 5
- The value of the key to be added - an empty string
''
Example expression:
addProperty(items('Add_checkbox_fields_to_each_object_in_SB_P5_M1_Data_Table_Array'), items('Iterate_through_the_list_of_checkbox_fields_SB_P5_M1_Data_Table_Array'), '')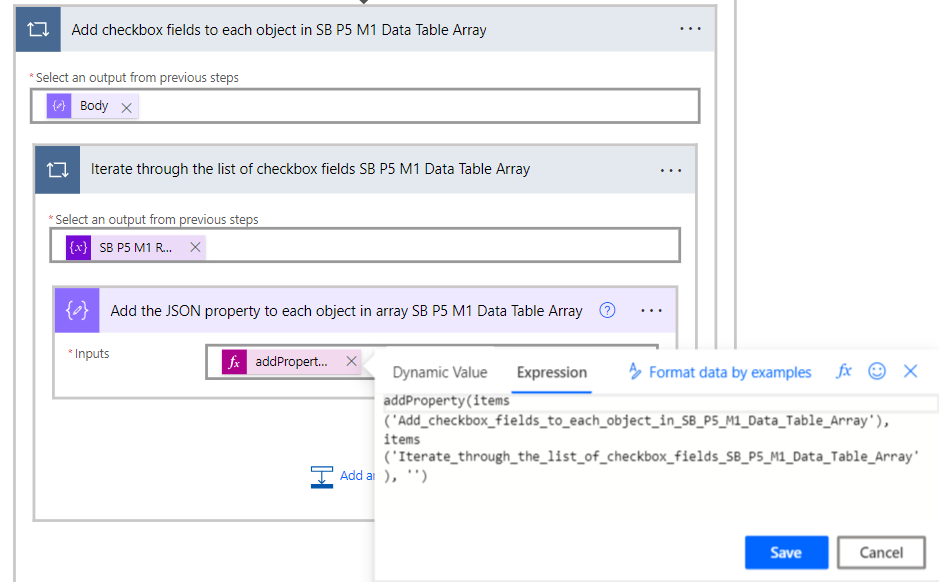
- Add a “Select” action. Provide the following arguments:
- From: the array of JSON objects to select from
- Map: the left column will be the key and the right column will be the value. Copy and paste in the names of all the columns that you want to include in your data table on the left (usually all of them except for
__id). On the right, format the outputs from the “Parse JSON” action usingformatDateTimeandformatNumberif needed. Use theiffunction if you need to process the inputs further for specific outputs based on a condition. Otherwise, you can simply map the corresponding output for text fields.
Example:
if(contains(item()['colddmcSBP5MemployedBy'], 'MTA'), '☑', '☐')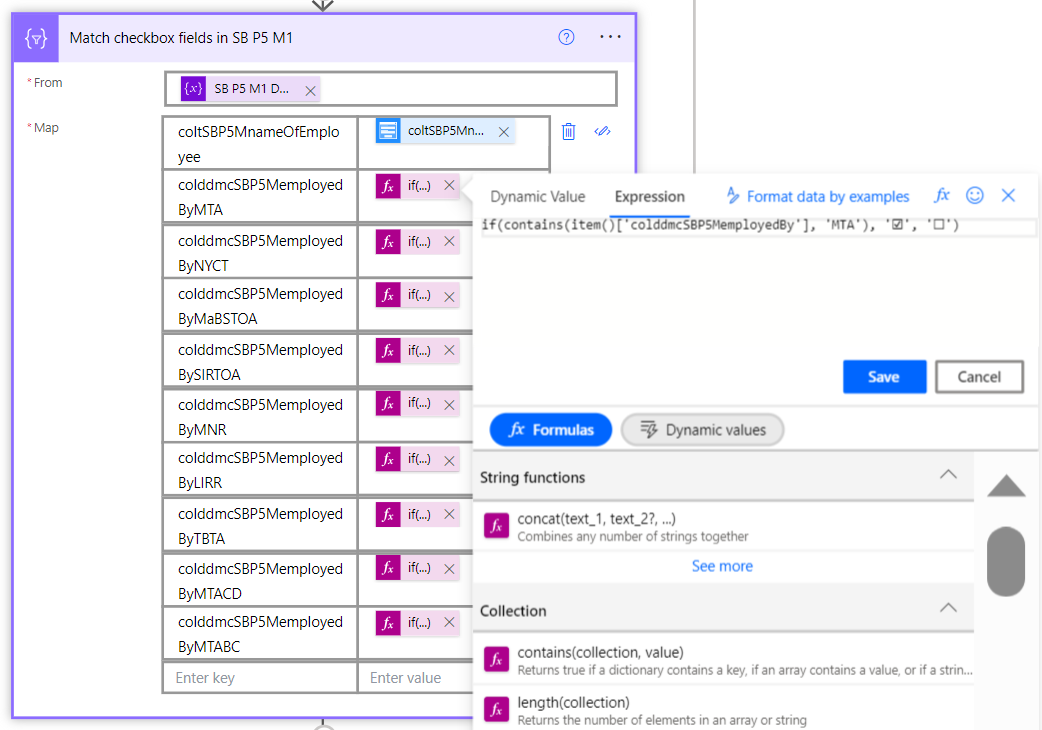
Set the data table variable equal to the output of the “Select” action.
Map the variable to the corresponding Content Control.
[OPTIONAL] You can place your “Parse JSON,” “Select,” and “Set variable” actions in a [“Scope”(https://www.bloomsoftwareco.com/blog/keep-your-flows-organized-using-scopes-in-power-automate)] to organize them into one block. This can be helpful especially if you have many data tables to handle. You cannot place “Initialize variable” actions in a “Scope” however, as Power Automate requires this to be on the top-level and it cannot be nested in any action. When placing actions in a “Scope”, order is important as these actions depend on the one before.
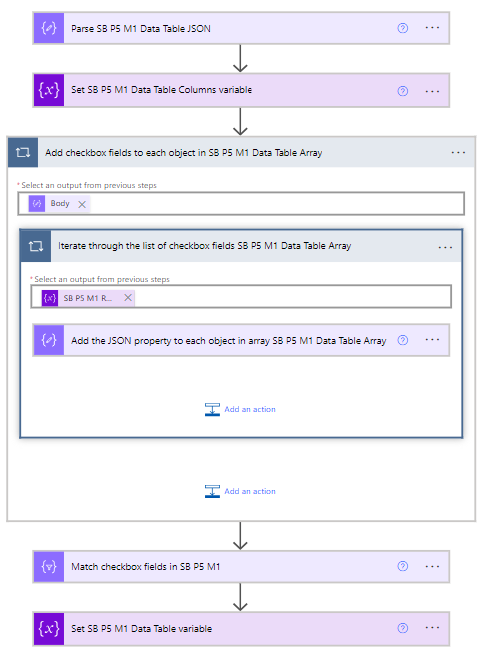
You’re done! Below is an overview of what a completed sequence looks like. The initialization of arrays occurs above these actions and is not shown.
Back to Handling Data Table Cases Back to Top
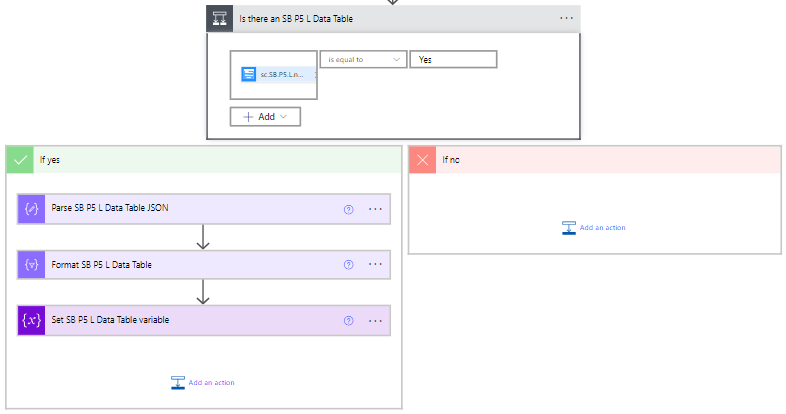
Case 4: Non-Required Data Tables
Add a “Condition” block to check whether the data table is applicable. Then nest the actual processing of the data table inside one of the blocks.
Back to Handling Data Table Cases Back to Top
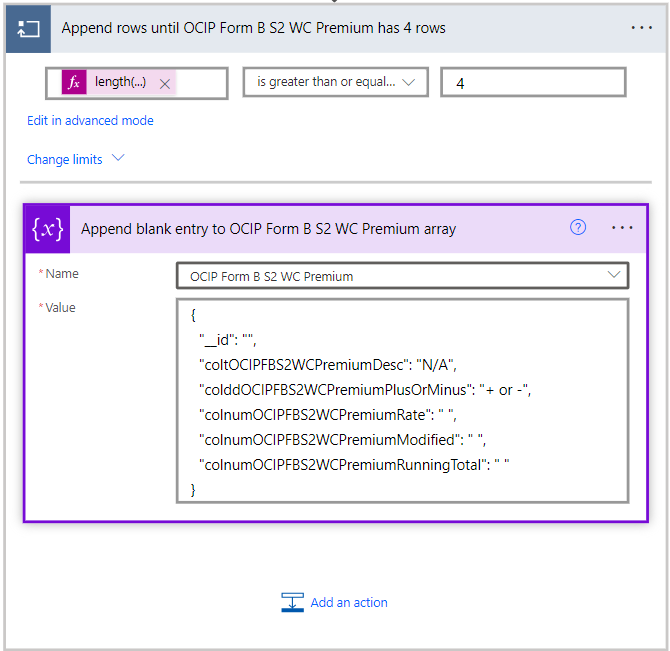
Case 5: Default Values
Follow the steps in Case 2. After creating your data table array variable, selecting the properties, and setting the variable, create an “Append to array variable” action. Append to that data table array variable an object with the keys "__id" and all of the other keys with default values.
Back to Handling Data Table Cases Back to Top
Handling Ink Sketch Controls
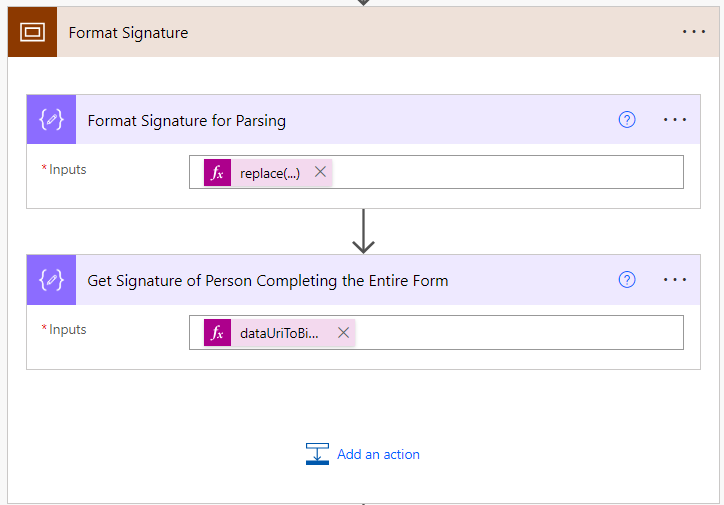
The output of an Ink Sketch Control on Plumsail is a PNG. However, this must be formatted before it can be used to populate a Word Document. To properly format these controls for Word Template Population:
- Create a “Compose” action or “Initialize variable” action and add the following expression:
replace(<inkSketchInternalName>, '"', '') - Create another “Compose” action or an “Initialize variable” action immediately after the previous action and add the following expression:
dataUriToBinary(<outPutOfPreviousAction>) The output of step 2 can now be used for population of Picture Content Controls. Note that the dimensions are warped to fit the dimensions of the Word Template Picture Content Control and do not maintain the original image’s dimensions. Thus you will have to manually adjust the dimensions within the Word Template itself and reupload if you need to edit it.
Download Attachments from Plumsail Forms
All attachments from Plumsail Forms are PDFs in this workflow. This is ensured by the JavaScript code prior to the submission of the Subcontractor Form.
Create a “Download attachment” action from Plumsail Forms. This should be in the same branch as the form the attachment belongs to. See the section on Download attachment for additional information on this action.
Select the
urlfrom “Dynamic Value” for the argument.Open the “Apply to each” action that autogenerates and add a “Create file” action after the “Download attachment” action. If the autogenerated attachment field for the
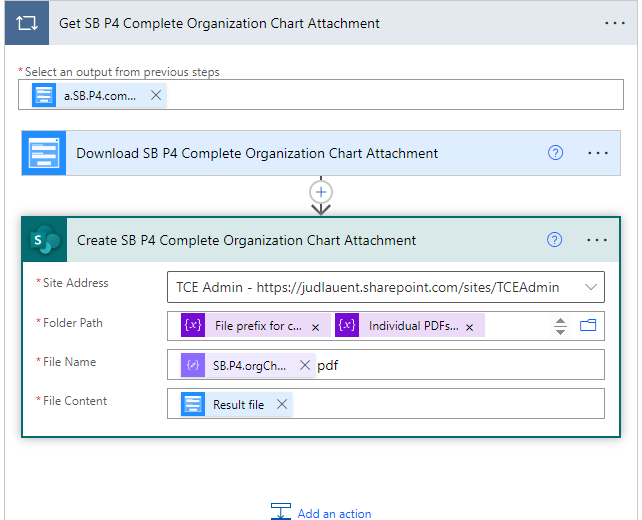
urlthat you selected does not match the branch you initially placed it in, you can drag it to the correct branch later or delete it. Either way, you will have to go back to Step 1 and repeat until you have found the correcturl.- Add the appropriate parameters for the “Create file action”. Rename your actions to be more descriptive to the attachment that you are downloading.
- Site Address: base URL to place the attachment in.
- Folder Path: the relative path of the attachment to be created. Using the conventions, the folder path for an individual Word Document is:
.../<contractNumber>/<subcontractorName>/<timestamp>/Individual PDF DocumentsIn the image, the above expression has already been formatted as a variableFile prefix for creating filesappended by another variable calledIndividual PDFs File pathlocated in Block 1 which you can access through “Dynamic Value” - File Name: the file name of the Word Document. The file name prefix has already been defined in a variable called
Form Order and Filenames- a JSON object which is parsed with a “Parse JSON” action calledParse subcontractor form filenames JSONin Block 1. Each property’s key is the abbreviated version of the corresponding form and the value is the file name prefix. If you are adding a new form, you will need to add the file name prefix toForm Order and Filenamesand update the schema in theParse subcontractor form filenames JSONaction. Then, in this field use the “Dynamic Value” and find the appropriate output from theParse subcontractor form filenames JSONaction and append it withpdf. - File Content: in “Dynamic Value,” select the “Result file” output from the “Download attachment” action from before.
If this form is not always required and the form needs to be merged into a packet, you will also have to add an “Append to array variable” action. It doesn’t matter the order you put this action, as long as it is in the same branch. Right now, this action is above the “Populate a Word template” action. The arguments should be filled out such that the array to append to is the array of forms for the particular packet that the form belongs to and the value is the file name for the form from the
Parse subcontractor form filenames JSONaction.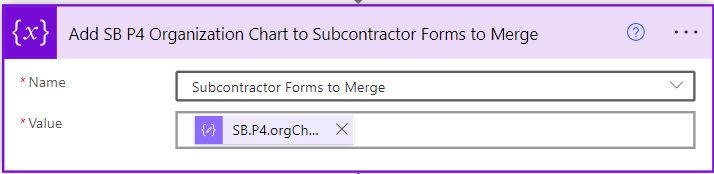
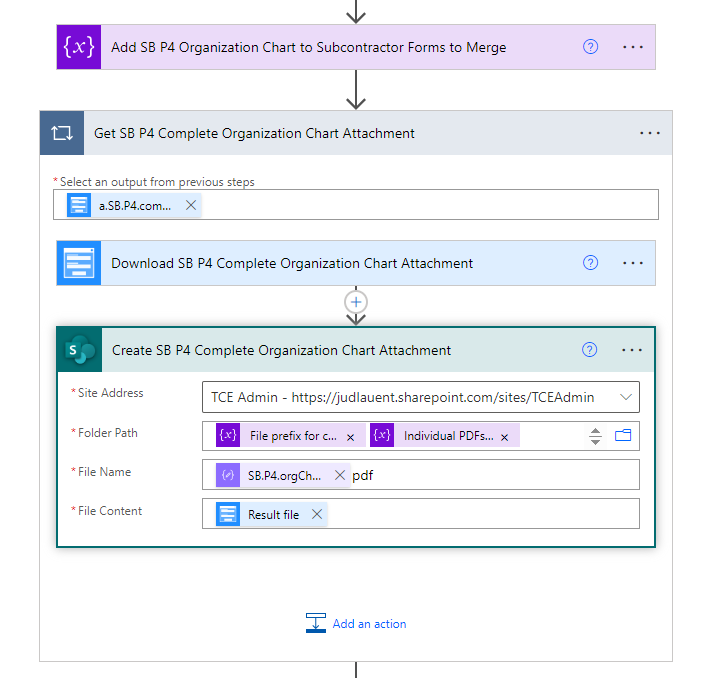
You’re done! Below is an example of a completed “Download attachments from Plumsail Forms” sequence.
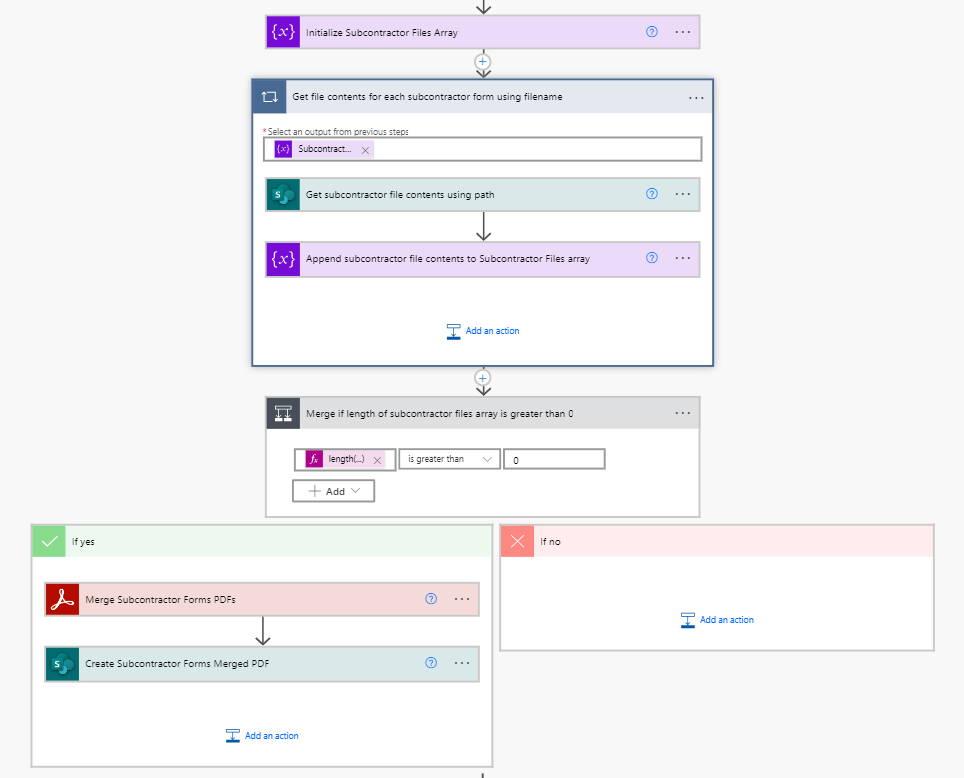
Merging PDFs
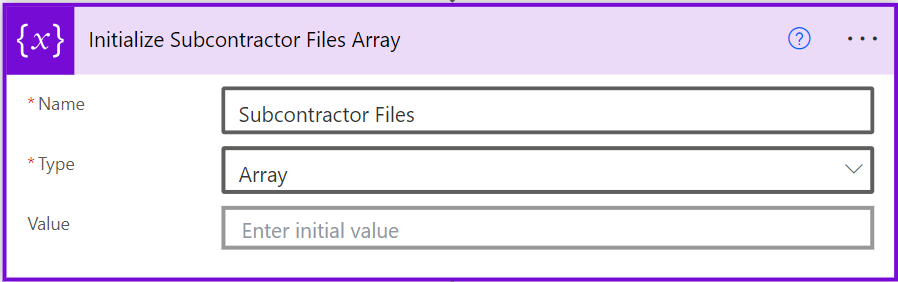
Initialize an array variable using the “Initialize variable” action. This will store the file contents of the PDFs to be merged and will be appended with content. No initial value was provided so it starts as an empty array. Name the action and variable so that they are descriptive.
Add an “Apply to each” action. Iterate over the array of file name prefixes for files to be merged. In this example, that variable is
Subcontractor Files to Merge.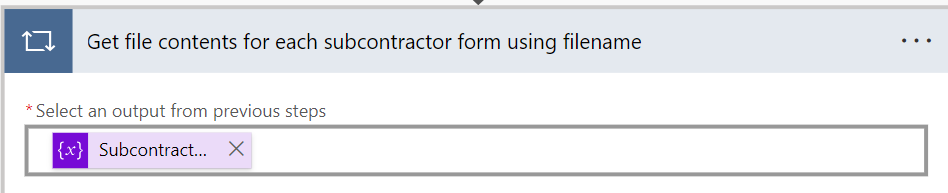
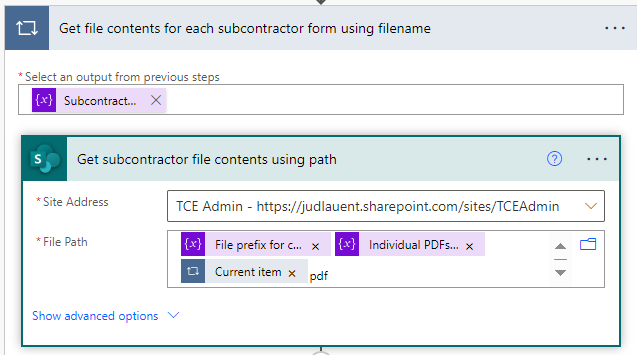
- Add a “Get file content using path” action. Rename the action to be specific and descriptive to ts purpose. Supply the following parameters:
- Site Address: base URL to find the files to be merged
- File Path: the relative path of the attachment to be created. Using the conventions, the folder path for an individual Word Document is:
.../<contractNumber>/<subcontractorName>/<timestamp>/Individual PDF DocumentsIn the image, the above expression has already been formatted as a variableFile prefix for creating filesappended by another variable calledIndividual PDFs File pathlocated in Block 1 which you can access through “Dynamic Value”. This should then also be appended with/, the “Current item” output from the “Apply to each action” that you created before which is the file name prefix, and finallypdf.
Add an “Append to array variable” action after the “Get file contents using path” action. Append to the array variable created to hold the file contents the following value
trim(base64(body(<name of "Get file contents using path" action>)))and replace<name of "Get file contents using path" action>with the appropriate value.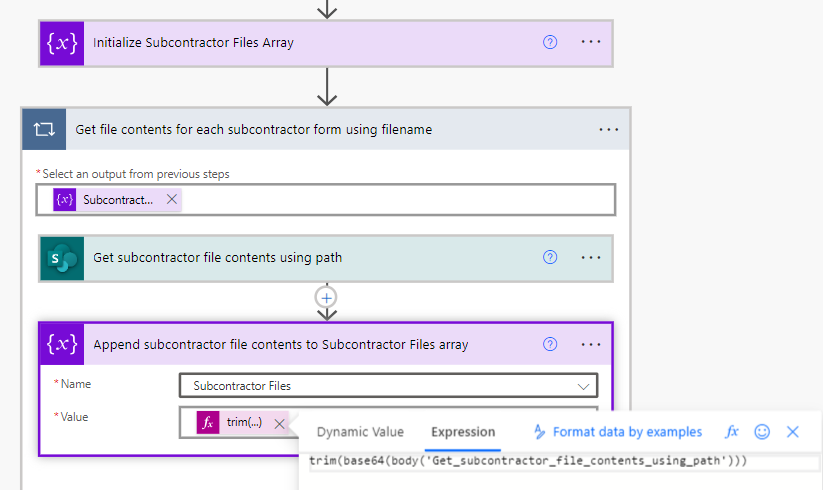
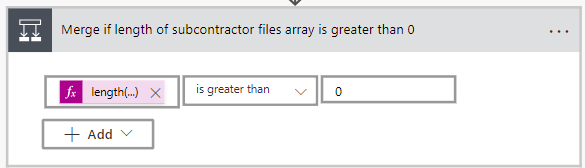
[OPTIONAL] If you are sure that there will be at least 1 file to merge, you do not have to chack the length of the array and can skip to the next step. Otherwise, add a condition action and check if the length of the array is greater than 0.
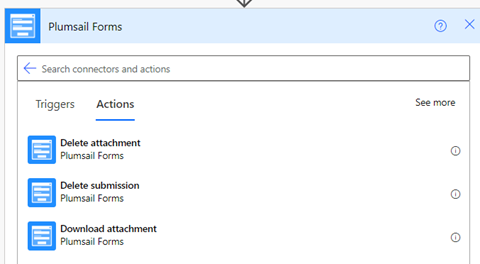
In the “If yes” box, add a “Merge PDFs” action from the Adobe PDF Services connector. Rename this action to be more descriptive. If a connection has not already been added, you will be prompted with the below image:
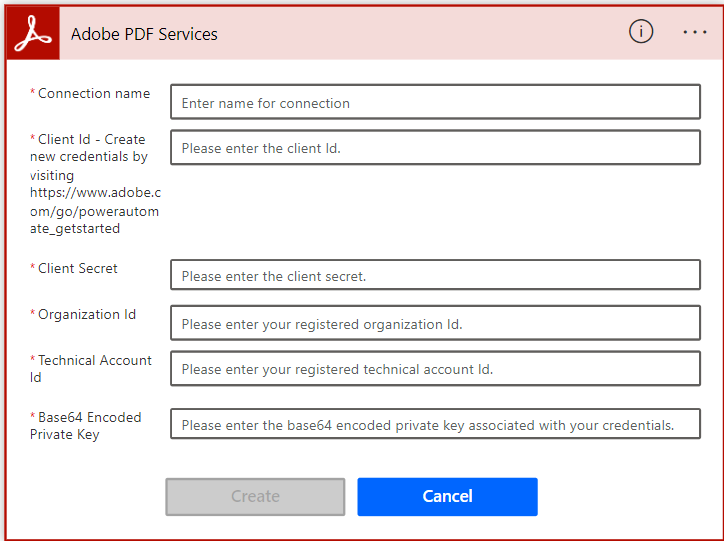
You will have to go to the Adobe Website to create free credentials for the Adobe PDF Services API here. Follow the instructions on the website. After creating a connection, you can provide the corresponding values. Otherwise, you can also add a new connection by first saving your flow and then going Data –> Connections in the left menu. Click on “+ New Connection” and scroll down to find the Adobe PDF Services where it will ask you for the same parameters.
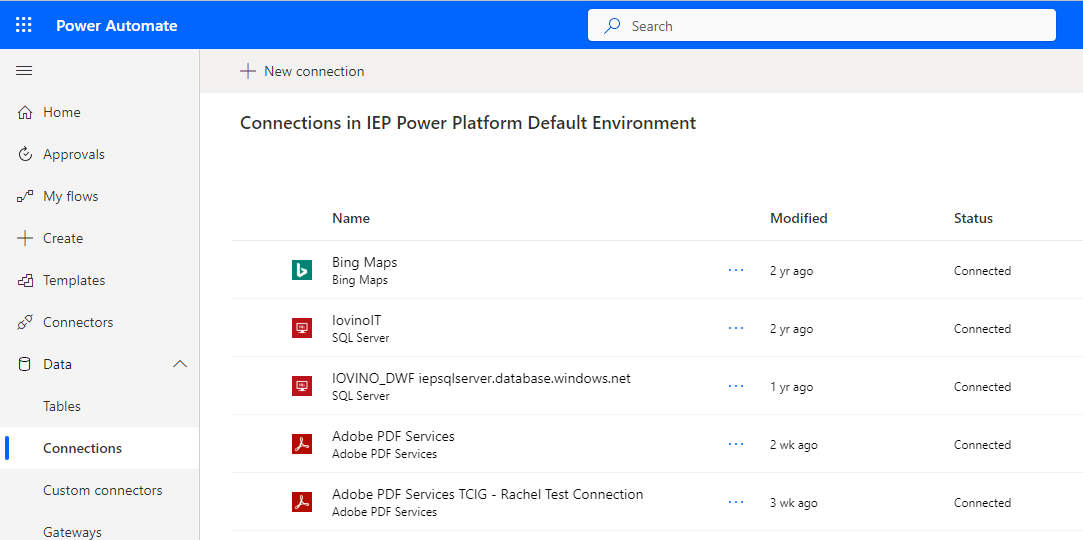
Once you add the connection, you will not have to repeat this for other instances of Adobe PDF Services actions.
Supply the following arguments to the “Merge PDFs” action:
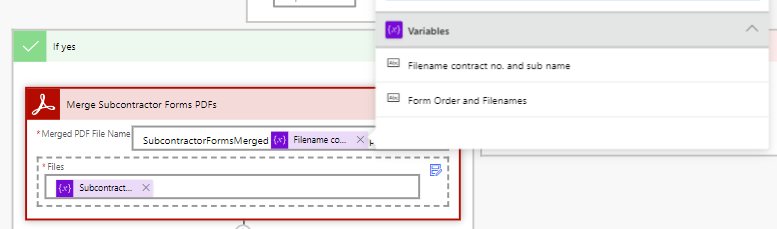
- Merged PDF File Name: provide a descriptive name for the PDF packet to be created after merging and append it with the contract number and subcontractor name. This is provided in a variable called
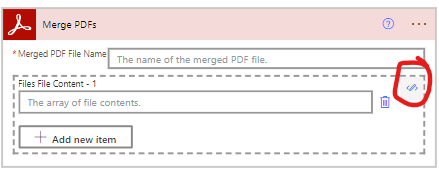
Filename contract no. and sub namewhich can be accessed through “Dynamic Value”. - Files: change the type of input into an array instead of individual files and their names by clicking on the top right blue icon. Then add the array variable you initialized in Step 1.
- Merged PDF File Name: provide a descriptive name for the PDF packet to be created after merging and append it with the contract number and subcontractor name. This is provided in a variable called
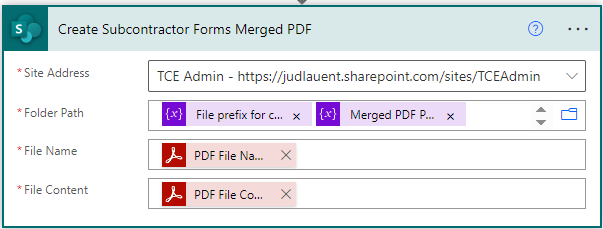
- Add a “Create file” action below the “Merge PDFs” action. Add the appropriate parameters for the “Create file action”.
- Site Address: base URL to place the merged PDF packet in.
- Folder Path: the relative path of the attachment to be created. The folder path for PDF packets is:
.../<contractNumber>/<subcontractorName>/<timestamp>In the image, the above expression has already been formatted into a variable calledMerged PDF Packets File pathlocated in Block 1 which you can access through “Dynamic Value” and append to the rest of the path.
To ensure that you have the correct path initially, use the blue folder icon in the corner to navigate to the base folder, then append the variable
Merged PDF Packets File path. This path is also subject to change, and if it needs to be updated, update the variable in Block 1.- File Name: the file name of the Word Document. Select the
PDF File Nameoutput from the “Merge PDFs” action. - File Content: The content of the merged PDF packet. Select the
PDF File Contentoutput from the “Merge PDFs” action.
You’re done! Below is an example of a completed “Merge PDFs” sequence.
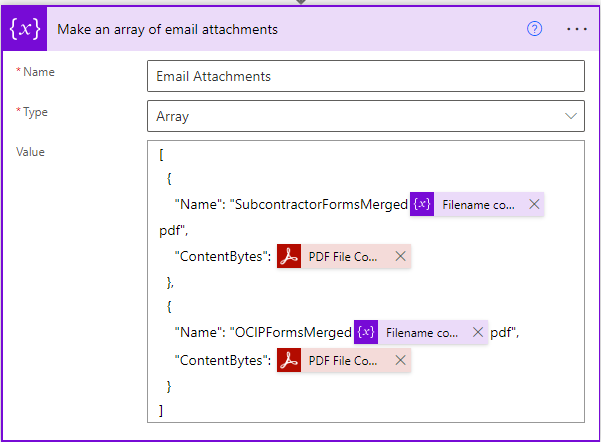
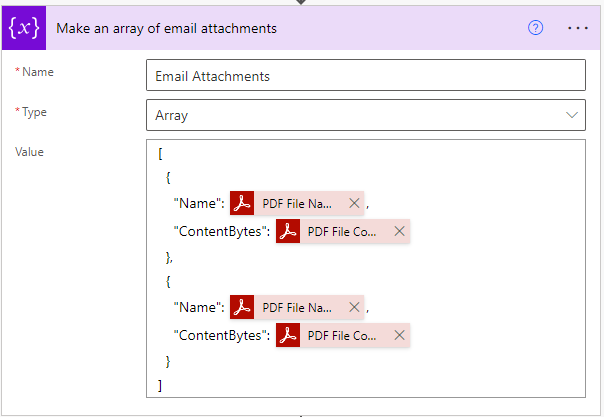
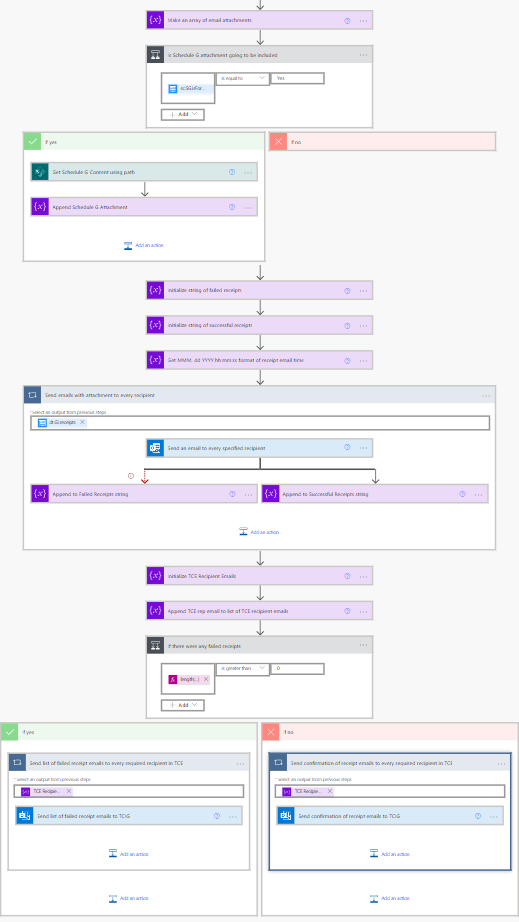
Emailing a Variable Number of Attachments from SharePoint to a Variable Number of Recipients
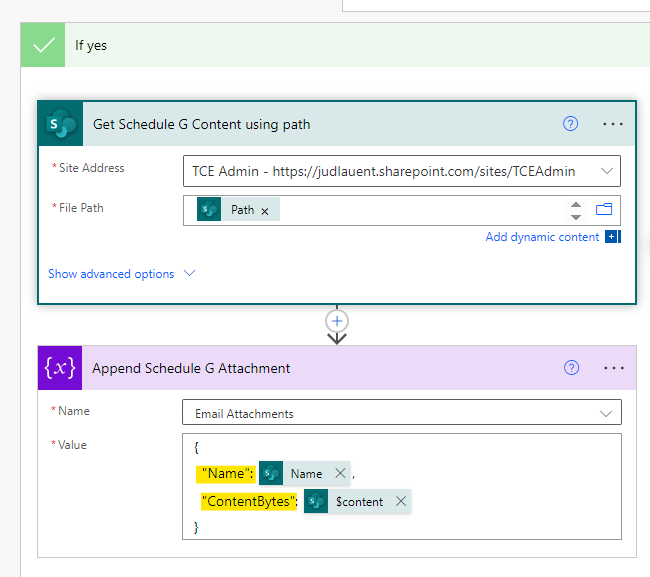
- Initialize an array variable for the email attachments. If there are any attachments that will always be included in the email, you can provide them in the initial value. Each file to be attached is represented as a JSON object with the properties:
"Name": the name of the attachment. If you have a previous “Merge PDFs” action, you can supply the “PDF File Name” output. You can also provide a different name if you’d like (see images below)"ContentBytes": the content of the attachment. If you have a previous “Merge PDFs” action, you can supply the “PDF File Content” output.
- For any attachments that are not always included in the email, add a “Condition” action to check when it should be included. Depending on your condition, you will then add a “Get file content using path” action in either the “If yes” or “If no” block. Rename the action to be specific and descriptive to ts purpose. Supply the following parameters:
- Site Address: base URL to find the files to be merged
- File Path: the relative path of the attachment to be created. You can go into “Dynamic Value” and find the corresponding “Create file” action with a “Path” output.
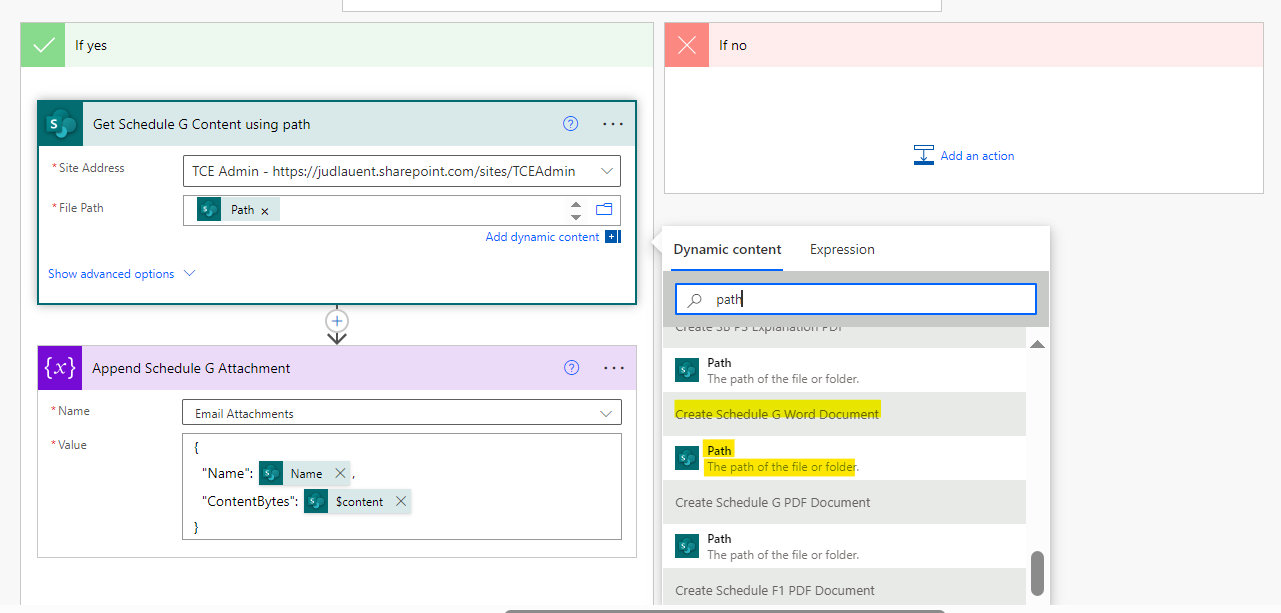
- Add an “Append to array variable” after the “Get file content using path” action. Append a JSON object with the following properties to the variable you created in Step 1:
- “Name”: “Name” from the “Get file content using path” action”
- “ContentBytes”:
body(<nameOfGetFileContentUsingPatchAction>)?[$content]
Initialize strings for email addresses that successfully were sent the emails and unsuccessfully were sent the emails. Provide no initial value. You can also initialize a string to format the time of the receipt.

Create an “Apply to each” action. Rename it to be descriptive for its purpose. Iterate over the list of emails provided by the subcontractor to send receipts to. This will come from the Plumsail Forms and is called
dt.GI.receipts.
- Within the “Apply to each” action, create a new “Send an email (V2)” action. Provide the following arguments:
- To:
coltGIreceiptsEmail(the current item from the enclosing “Apply to each” action) - Subject: subject of the email. You can add dynamic content here.
- Body: body of the email. You can add dynamic content here.
- From (Send as): [OPTIONAL] TCIG@tcelect.net
- CC: [OPTIONAL] any emails to be CC’d
- BCC: [OPTIONAL] any emails to be BCC’d
- Attachments: the array of attachments that you made earlier. You will have to click “Show advanced options” to see this field. Remember to change the input type so that you can attach an array instead of individual attachments and their names. There are several other arguments as well that you can fill in as needed.
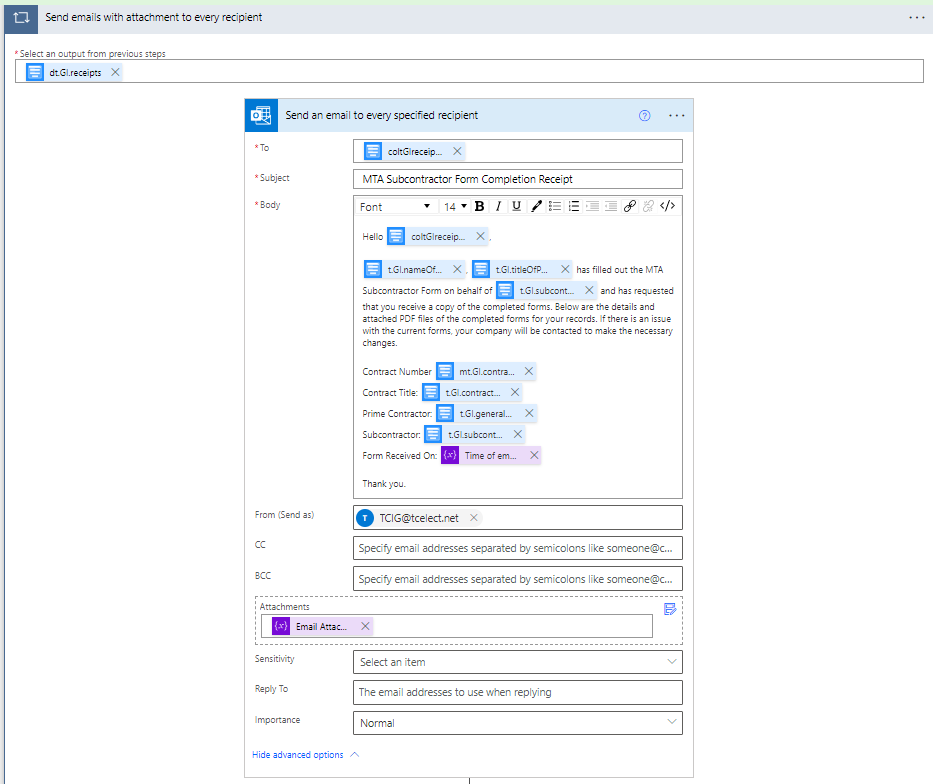
- To:
Create two “Append to string variable” actions in parallel with each other. One will add the emails of successful receipts to the array of successful emails, and the other will add the emails of failed receipts to the array of failed receipts. Configure the run after for the “Append to string variable” action for failed receipts such that it will run after the “Send email (v2)’ action has failed, is skipped, or has timed out.
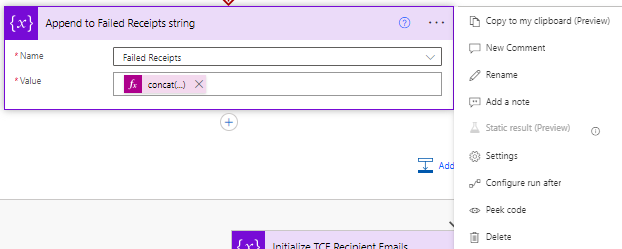
The value to be appended in both is:
concat(items('Send_emails_with_attachment_to_every_recipient')?['coltGIreceiptsName'], ': ', items('Send_emails_with_attachment_to_every_recipient')?['coltGIreceiptsEmail'], '<br>')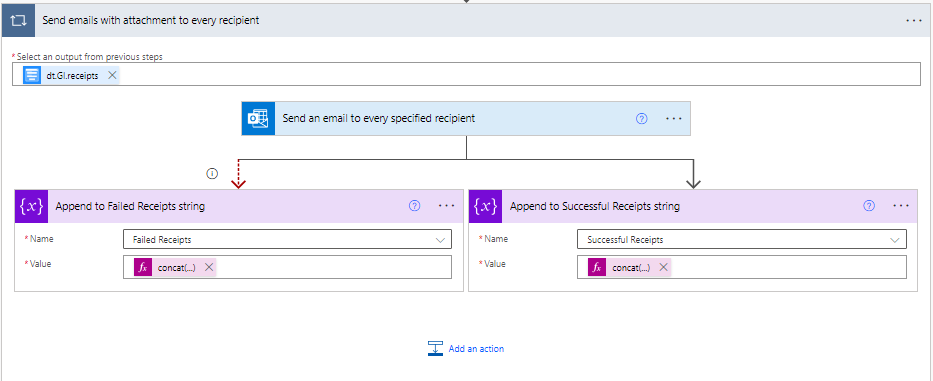
Initialize an array of TCE-specified recipient emails. These emails will be sent a notification that the subcontractor has completed the forms and whether all emails were sent successfully. Also, append
t.GI.primeContractorRepresentativeEmailfrom Plumsail Forms.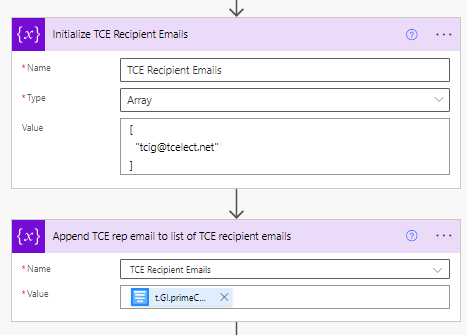
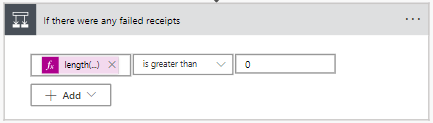
Create a “Condition” action to check whether the length of the string of failed emails is greater than 0.
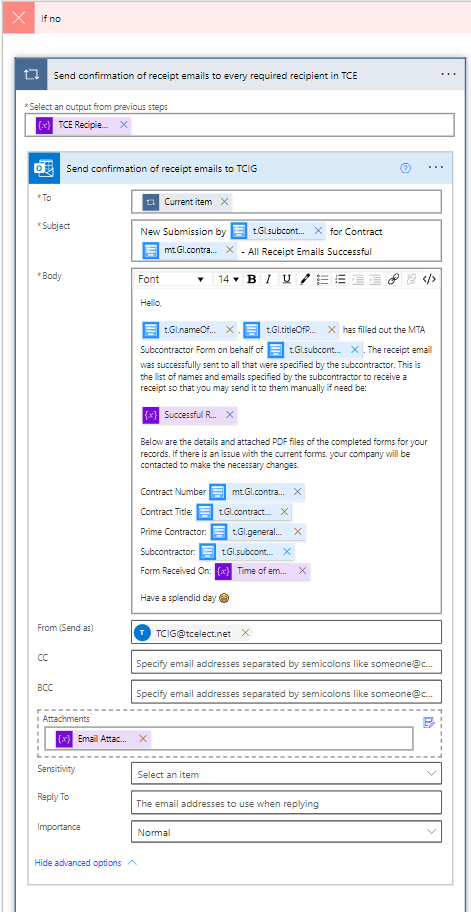
In the “If no” block, create an “Apply to Each” and iterate over TCE Recipient Emails array. Create a “Send email (v2)” action similar to before in step 6, except that this email is not to the subcontractor, but TCE and should be written that way. Within the email body, add the string of successful receipts using the variable created before.
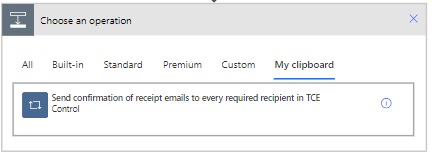
Copy the “Apply to each” action from the “If no” block into the “If yes” block by clicking on the three dots and selecting “Copy to my clipboard (Preview)”.
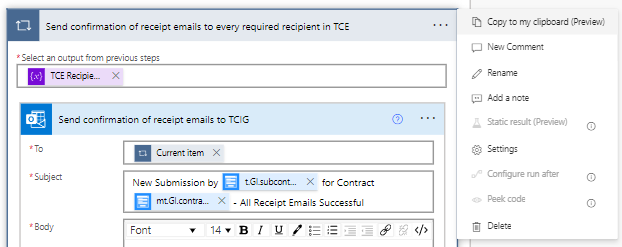
Add an action in the “If yes” block and go to the “Clipboard” tab to paste in the copied actions. Adjust the copied actions to reflect that in the “If yes” block, you will be sending an email notifying TCE that not all emails were successfully sent.
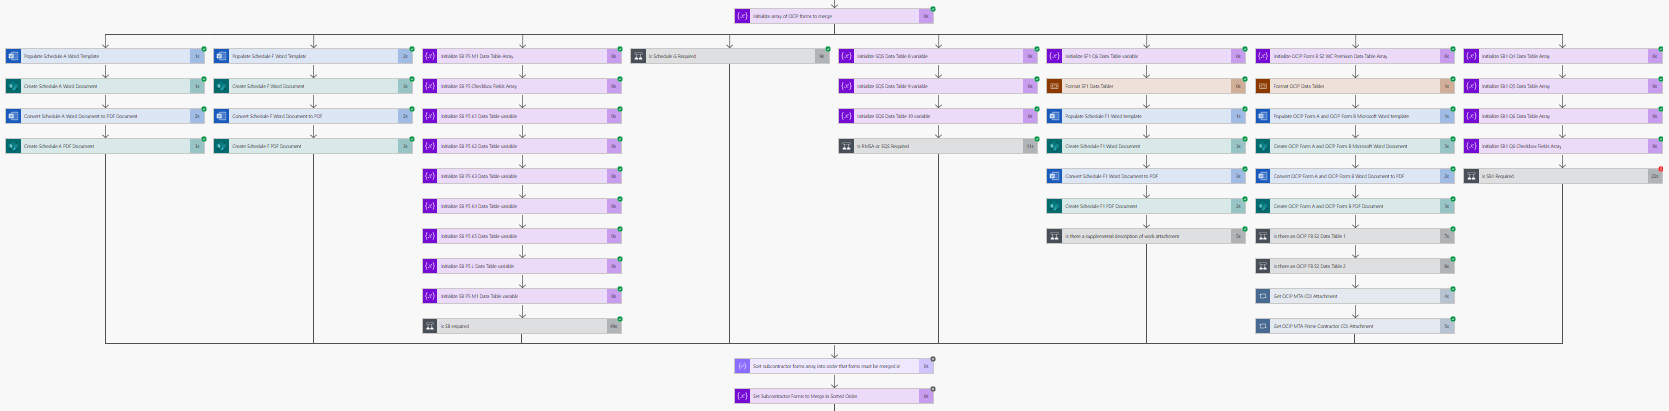
You’re done! Below is an overview of what the complete sequence looks like:
Changing File Locations, Names, or Merge Order
In case files need to be redirected to another location, file paths and file names have been broken down into variables defined early in the flow. These variables are:
Word Docs File path: path for subfolder to place generated individual Word Documents.Individual PDFs File path: path for the subfolder to place generated individual PDF Documents.File prefix for converting: path to the “Individual Word Documents” subfolder.IncludesWord Docs File pathFile prefix for creating files: path to the “Individual PDF Documents” subfolder. Used in conjunction with either theWord Docs File pathorIndividual PDFs File pathMerged PDF Packets file path: path to place the merged PDF packets.Form Order and Filenames: JSON object defining the list of names for each form. The number in the beginning is the order that the form is to be merged in, followed by the name of the form, and appended by the file name contract number and subcontractor name. Change the key-value pairs here to update the name or order of the forms when they are generated and merged.