Editing a Microsoft Word Template
Table of Contents
Setup
Prepare the Word Document
To make a Microsoft Word Template, you first need to have a Word Document to make a template from. Your initial file may not always be a .docx file. In this project, there were Excel (.xlsx) files and PDF files. You must convert them into a .docx file first.
.xlsx File
If your starting file is an .xlsx, there unfortunately isn’t a way to directly convert the file into a Word Document and you have to convert to a PDF first.
Method 1
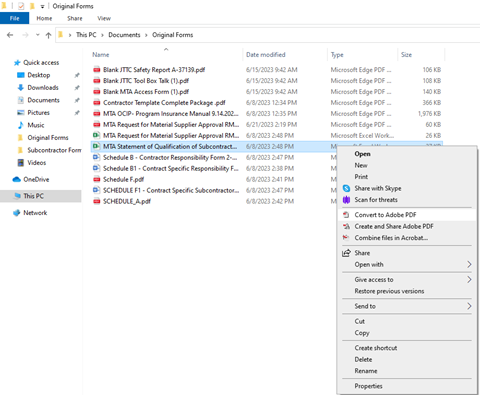
- Navigate to the directory where the Excel spreadsheet is located.
- Right click the file you want to change into a PDF.
- Select the “Convert to Adobe PDF” option and choose the file name and directory of the resulting PDF. This will then open in Adobe Acrobat Pro.
Method 2
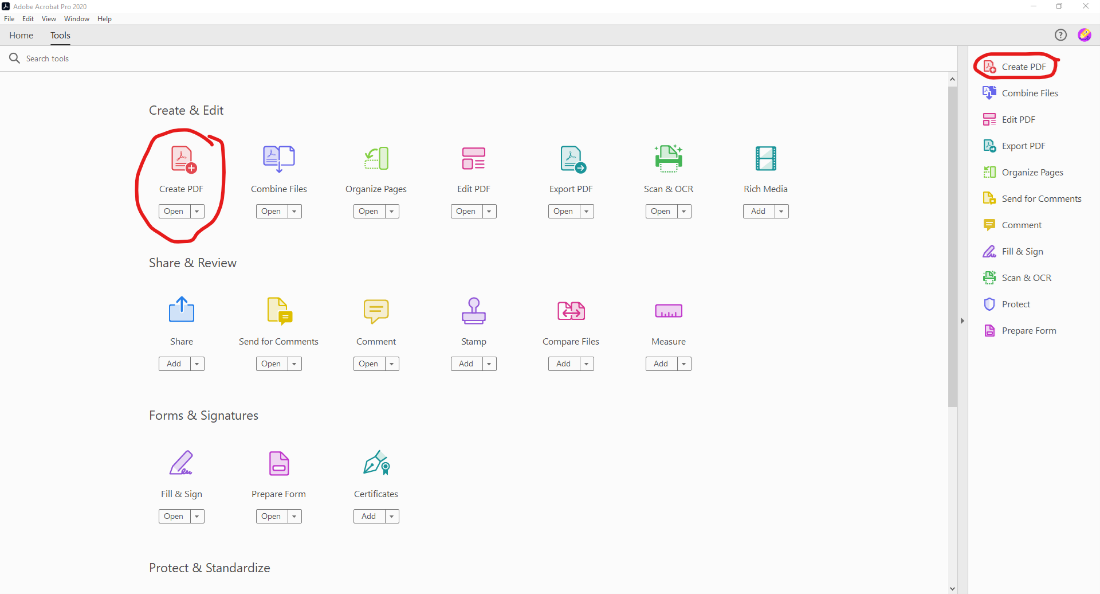
Open Adobe Acrobat Pro.

Select the tool “Create PDF” from the Tools Menu. You can find this on the right side. If it does not appear, you can add this tol by clicking “Add” under “Create PDF” in the Tools Menu.
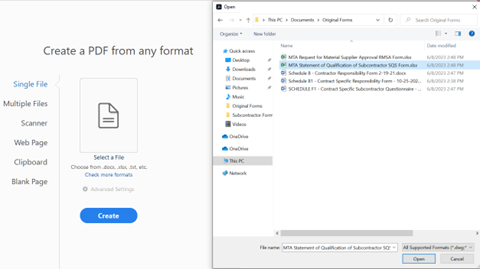
Select the file to be converted from your computer. You can do either a single or or multiple files.
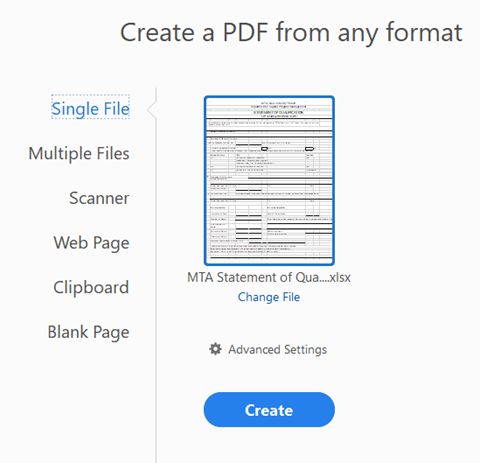
If you selected the wrong file, click “Change File” and otherwise click “Create”. If your starting file is a PDF, open the file in Adobe Acrobat Pro and convert the PDF to Word.
Select the directory and file name for your PDF file by either clicking the “Save” button or the “Print” button.
.pdf Files
Open Adobe Acrobat Pro.
Select the tool “Export PDF” from either the Tools menu or the menu on the right. If the tool is not on the right side, you can select “Add” under the “Export PDF” tool to add it to the menu.
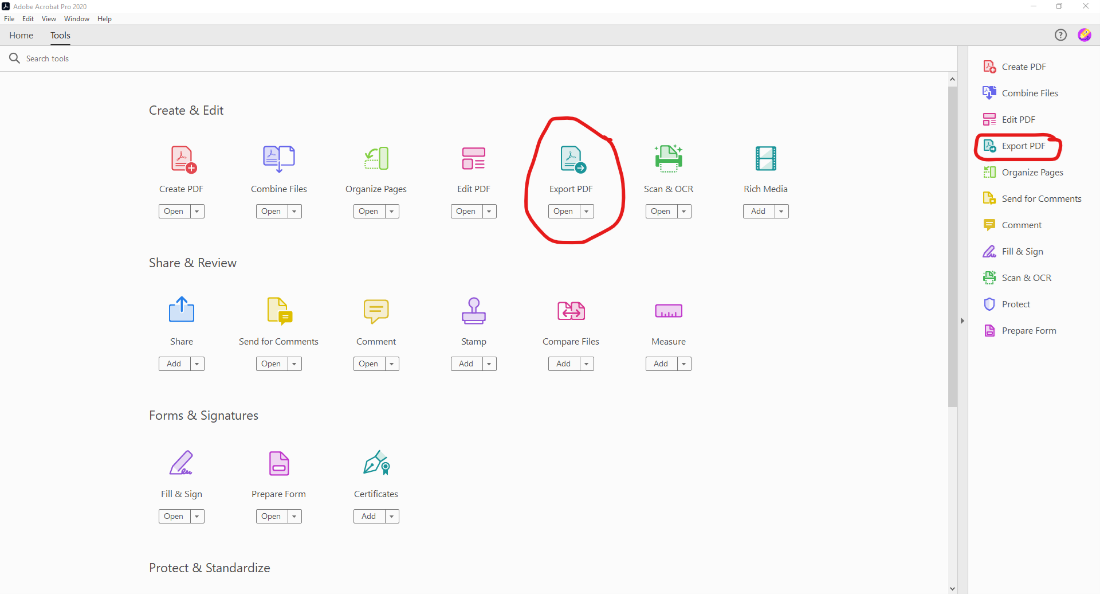
Select the file to be converted from your computer and Microsoft Word –> Word Document.
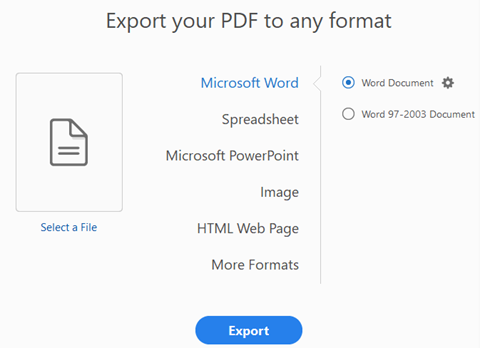
Click “Export” and choose the directory to save the Word Document. Also add a file name. The templates were named in CamelCase, like
ScheduleATemplate.docx.
Enable the Developer Tab
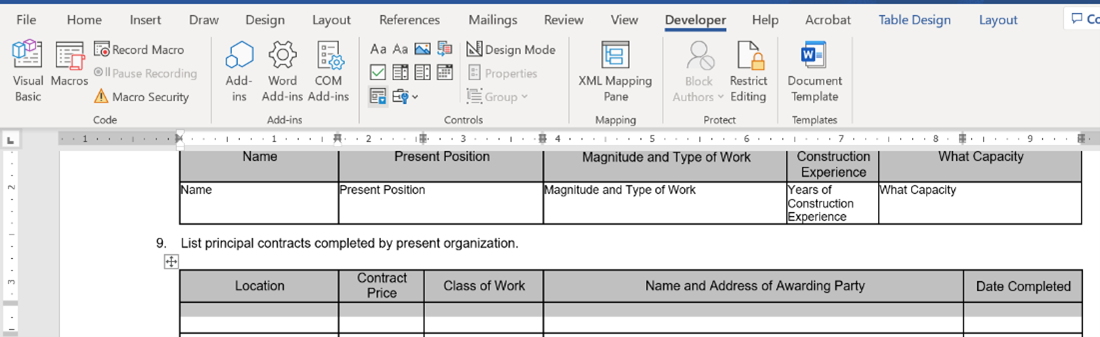
To edit a Microsoft Word Template, you will need the Developer Tab in the ribbon. This is only available on the desktop version of Microsoft Word. If this is already enabled, you will see the Developer Tab as shown below and can move onto Adding/Editing Content Controls:

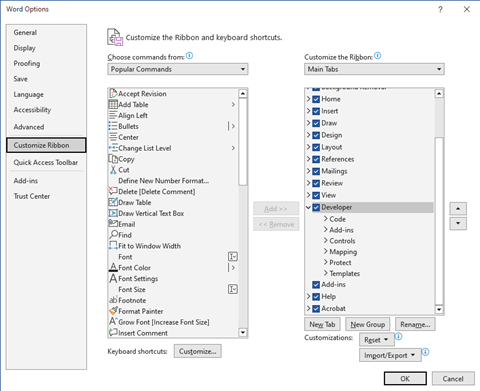
If it does not appear, go to Word Options in one of two ways:
- Right click on the ribbon and click on “Customize Ribbon” or…
- Click on File at the top left, and then go to Options at the bottom on the left. If you do not see options, you need to click on “More…” first.
Next, check the Developer box in the right column and click “OK”. You may have to scroll down to find it.
Adding/Editing Content Controls
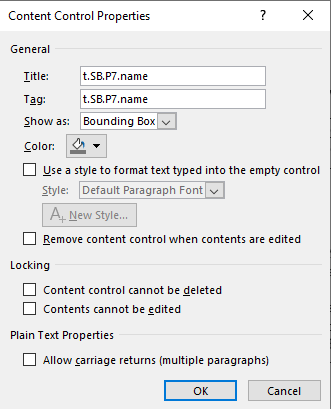
Word Template Content Controls include the following properties:
Title: text used to describe the content control it belongs toTag: a unique identifier for the content control it belongs to
To maintain consistency for easier maintainability in the future, when naming the Title and Tag, follow the naming conventions.
There are several types of Content Controls, but not all of them are supported for template population. Below are the Content Controls used in the “Process Subcontractor Form and Send PDFs” flow:
Plain Text Content Control
This is the most common content control that you will use. It is used for whenever you need to add a text field, dates, single choice buttons, and checkboxes.
As of 8/14/23, the “Populate a Word template” action in Power Flow Automate and Word do not support automatic population of checkboxes, radio buttons, or date pickers. While there are content controls specifically for these fields, we cannot use them for autopopulation. If you need to add any of the above, you must add a Plain Text Content Control for each field. See Adding Radio Buttons or Checkboxes for help specific to radio buttons and checkboxes.
Click on the location that you would like to add the control. If you are having trouble selecting the location you need to add the control, see Manipulating the Location of a Content Control.
If you only want to edit a control, skip to Step 3. Otherwise, go to the Developer Tab and click on the Plain Text Content Control button.
With your cursor inside the Plain Text Content Control of choice, click on “Properties” to edit the
TitleandTag.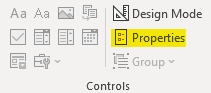
Fill in any of the other properties as necessary.
In addition to the
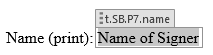
TitleandTag, Plain Text Content Controls have a few other properties. The ones of interest are:- Default Value: the value to be populated in the template if no value is provided. This is helpful for matching values when editing the “Populate a Word Template” actions in Power Automate. In the picture below, “Name of Signer” is the default text.
In Step 1, you can also highlight the text where you want to make the control. The text you highlight will become the Default Text of the Plain Text Content Control.
- Allow carriage returns (multiple paragraphs): allows newline characters to be entered in the content control. Useful if you anticipate that text needs to wrap onto another line.
Picture Content Control
Click on the location that you would like to add the control. If you are having trouble selecting the location you need to add the control, see Manipulating the Location of a Content Control.
If you only want to edit a control, skip to Step 3. Otherwise, go to the Developer Tab and click on the Plain Text Content Control button.
With your cursor inside the Plain Text Content Control of choice, click on “Properties” to edit the
TitleandTag. Follow the naming conventions.Fill in any of the other properties as necessary.
Resize the Picture Content Control as needed. If you have added this in a text box, the size of the Picture Content Control will be constrained to the size of the text box. You should resize the text box such that you have ample space to play around with the size of your Picture Control, otherwise you risk the image being populated with the bottom being cropped out.
Repeating Section Content Control
The Repeating Section Content Control is used for cases where you want to repeat a specific section for a known or unknown number of times, determined by the length of the array of contents to be placed into it. Anything enclosed by the Repeating Section Content Control will be repeated in every instance.You can add other content controls within the Repeating Section Content control as well. This is useful for anything that requires a Data Table in Plumsail.
- Select the area that you want to add a Repeating Section Content Control. You can only add one around entire paragraphs or rows:
- If you just want to add a Repeating Section Content Control around a whole line, select the line that you want to add it.
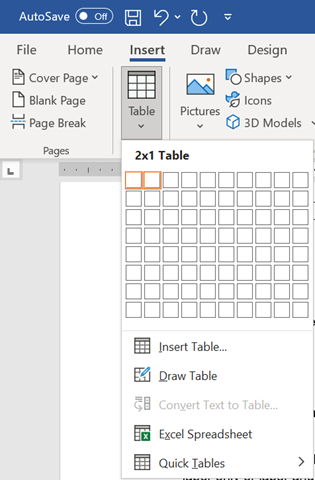
- If you want to make a rows of a table a Repeating Section Content Control, and do not have a table yet, create a new table by going to Insert –> Table. Select the number of rows and columns as needed. Then select the rows that you want to repeat.
Go to the Developer Tab in the Word ribbon and click on the Repeating Section Control button. Add any text and other Content Controls within the Repeating Content Control and add their
Title,Tag, and any other properties based on the conventions. Any content controls inside the repeating content control should begin with “col” because they will correspond to a column within the corresponding Plumsail Data Table column.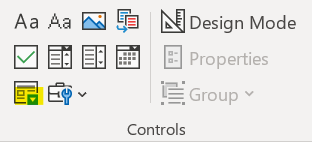
Repeating Section Content Control on a Line:


Repeating Section Content Control on a Table Row:

- Give the Repeating Section Content Control a
TitleandTagaccording to the conventions. Follow the conventions for Plumsail Data Tables as Repeating Section Content Controls correspond to them.
Special Cases
Manipulating the Location of a Content Control
Sometimes you will encounter a situation where you want to place a content control in a particular place but simply clicking on that location is not enough. For example:
- Placing a control inline with the text will cause content afterwards to shift, ruining the format of the document
- You want the content to overlap other content such as if the form is an image and you cannot select a line
A simple way to get around these problems is to use text boxes and position them exactly where you need your content control to go.
Go to Insert and click “Draw Text Box.”

Click and hold until you have the size of text box that you need. Alternatively, you can just click and resize later. If you need to resize your text box, move your cursor to the edge of the text box over any of the corner or center dots. At this point, click and drag to resize the box to whatever you need.
Go to “Shape Format” in the Word ribbon to change the shape fill and shape border. If you want the text box to have a transparent background, select the “No color” under Shape Fill If you want the text box to have no outline, select the “No outline” option under Shape Outline.

Click within the text box and add your content control as indicated in Adding/Editing Content Controls.
If you need to adjust the position of your text box again, move your cursor to the edge of the text box until it changes into the move symbol (a crosshair with arrows). At this point, click and drag the text box to wherever you need to.
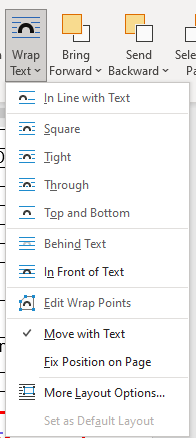
Text wrapping is important when positioning the text box. If you drew a text box, then it will have the “In Front of Text” option. Otherwise it will be the “In Line with Text” option. You can toggle between the “Move with Text” and “Fix Position on Page” options as well depending on whether you want the box to move with the text.
Adding Radio Buttons and Checkboxes
As of 8/14/23, the “Populate a Word template” action in Power Flow Automate and Word do not support automatic population of checkboxes, radio buttons, or date pickers. Due to this limitation, we will have to add a Plain Text Content Control for every radio button or checkbox separately. Generally, you will follow the same steps to add a Plain Text Content Control and follow the conventions for naming radio buttons or checkboxes. You may have to also follow the steps in Manipulating the Location of a Content Control if you want to overlay the contents of the content control over a box for example.
Example Checkbox: 
Example Radio Button:
Although this does not have the circular button shape associated with a radio button, the nature of this question is such that only one choice should be made.
